Dontcha just love it when you find that one thing that can replace many? Like that rain jacket that also looks good as an everyday jacket, AND has pockets to hold your stuff. Or, that handy device you can use to tap onto public transport, pay for your coffee, score yourself a hot date for Saturday night and buy the food for it (we believe it’s called a smartphone!) Yep, we’re all about that kind of convenience at Plann. That’s why we’ve gone beyond being *just* a social media scheduling app, and also pride ourselves on being like the Swiss army knife of editing photos, too.
After you upload a photo to Plann, you can click on the little magic wand icon that pulls up our editing menu. Here, you can completely transform your photo to match the kind of vibe and aesthetic you’re after in your feed — and you don’t even have to leave the app to do it. The best part is, you don’t have to be a professional designer or photographer to use them! They easily are used in place of fancy and complex editing apps to achieve a similarly striking effect.
Each of the options in our editing menu do different things to your photos. That’s why we’ve gone through each of the tools one by one, so you can edit your photos in Plann like a pro and create a spectacular feed!
Transform
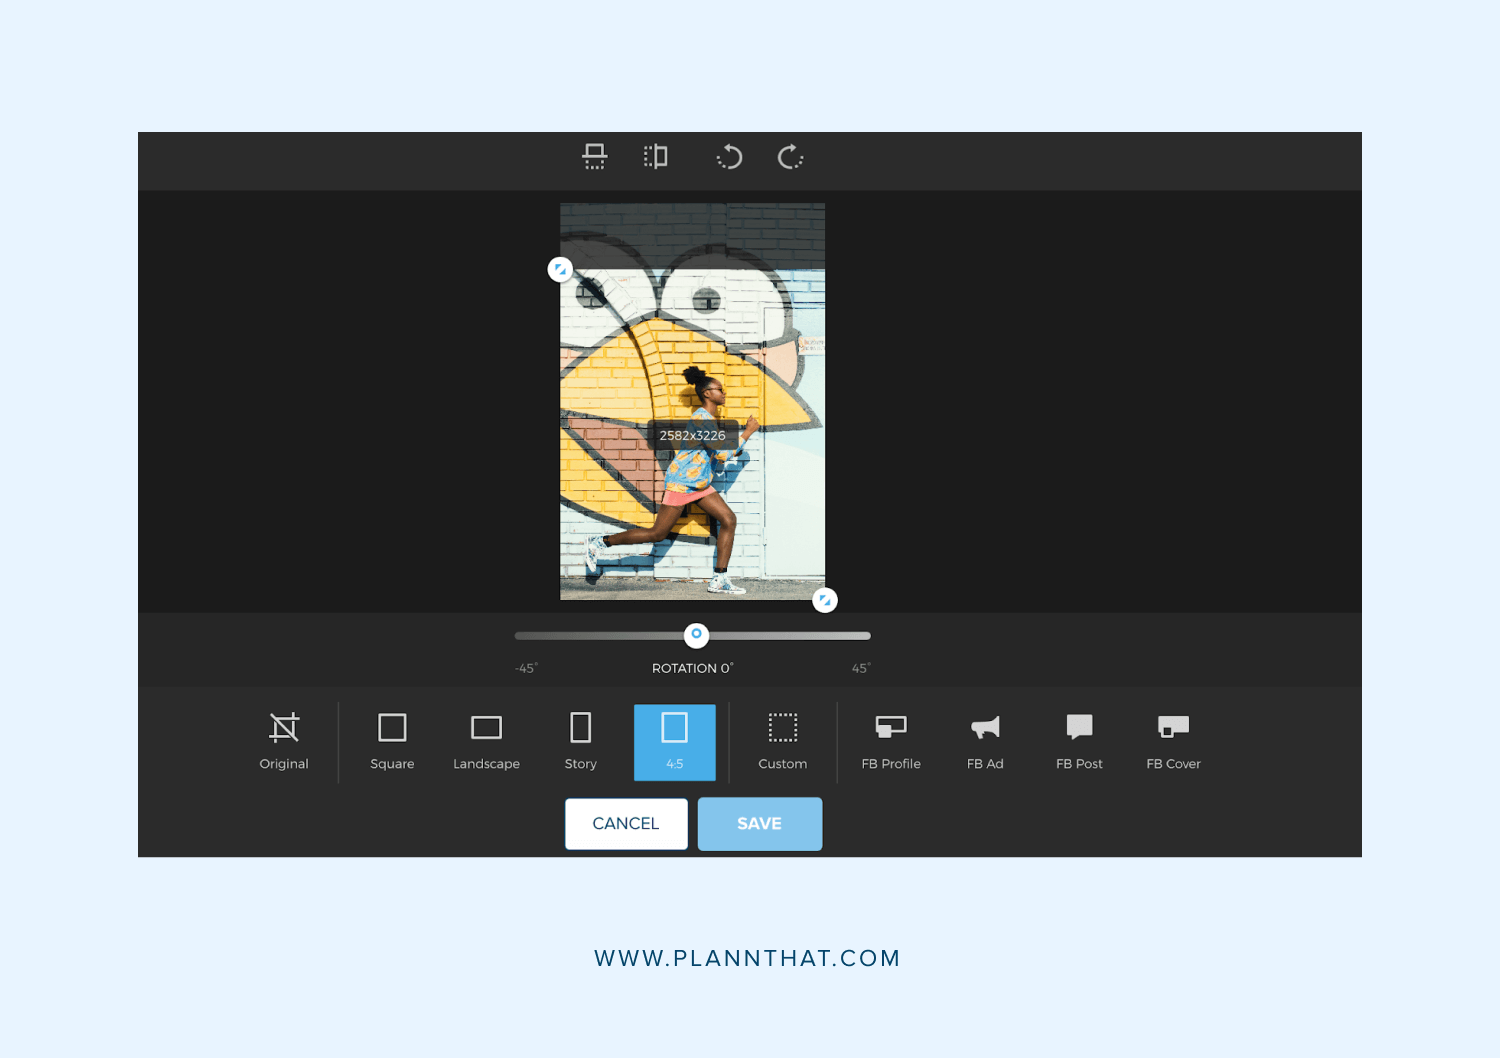 In the words of the great Missy Elliot, this is where you put your thing (aka. your photo) down, flip it and reverse it! Essentially, it allows you to edit the dimensions and orientation of your photo. One of the most common uses of this tool is to crop. So, maybe you want to cut a photo bomber or an ex-boyfriend out of your photo (hey, no judgement!) This is where you’d do that (just click ‘custom’ to drag the corners to where you want to crop your picture) But, you can also click on our dimension suggestions like square, landscape, story or 4.5 to instantly get the right crop for Instagram. This is especially handy if you want to post the same pic on your feed and story, with the correct dimensions.
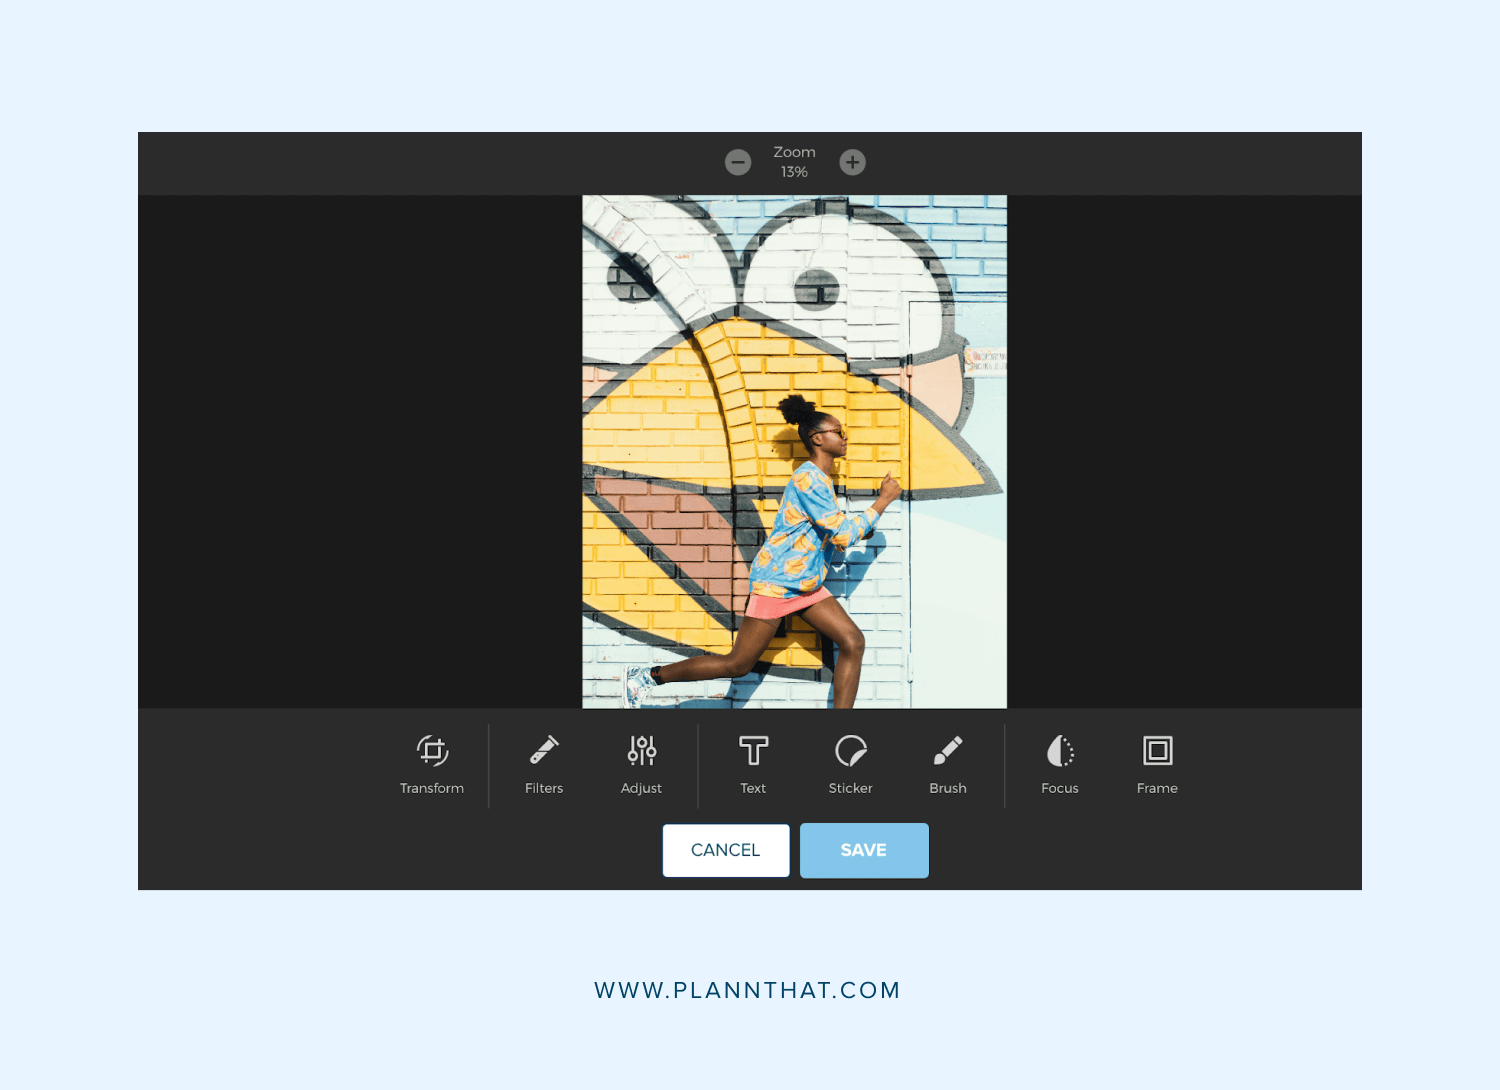 In the ‘transform’ tool, you can also use the ‘slider’ bar to rotate your photo. This is useful for when you’ve taken a landscape photo and the horizon is a little skew-whiff, as it allows you to make it more centred. Another cool feature is the ability to flip your photos, both vertically and horizontally. When you take a snap on an iPhone, it automatically flips it like a mirror image. So, you can use this if you want to reverse it or have the subject of your image facing a certain way.
Filters
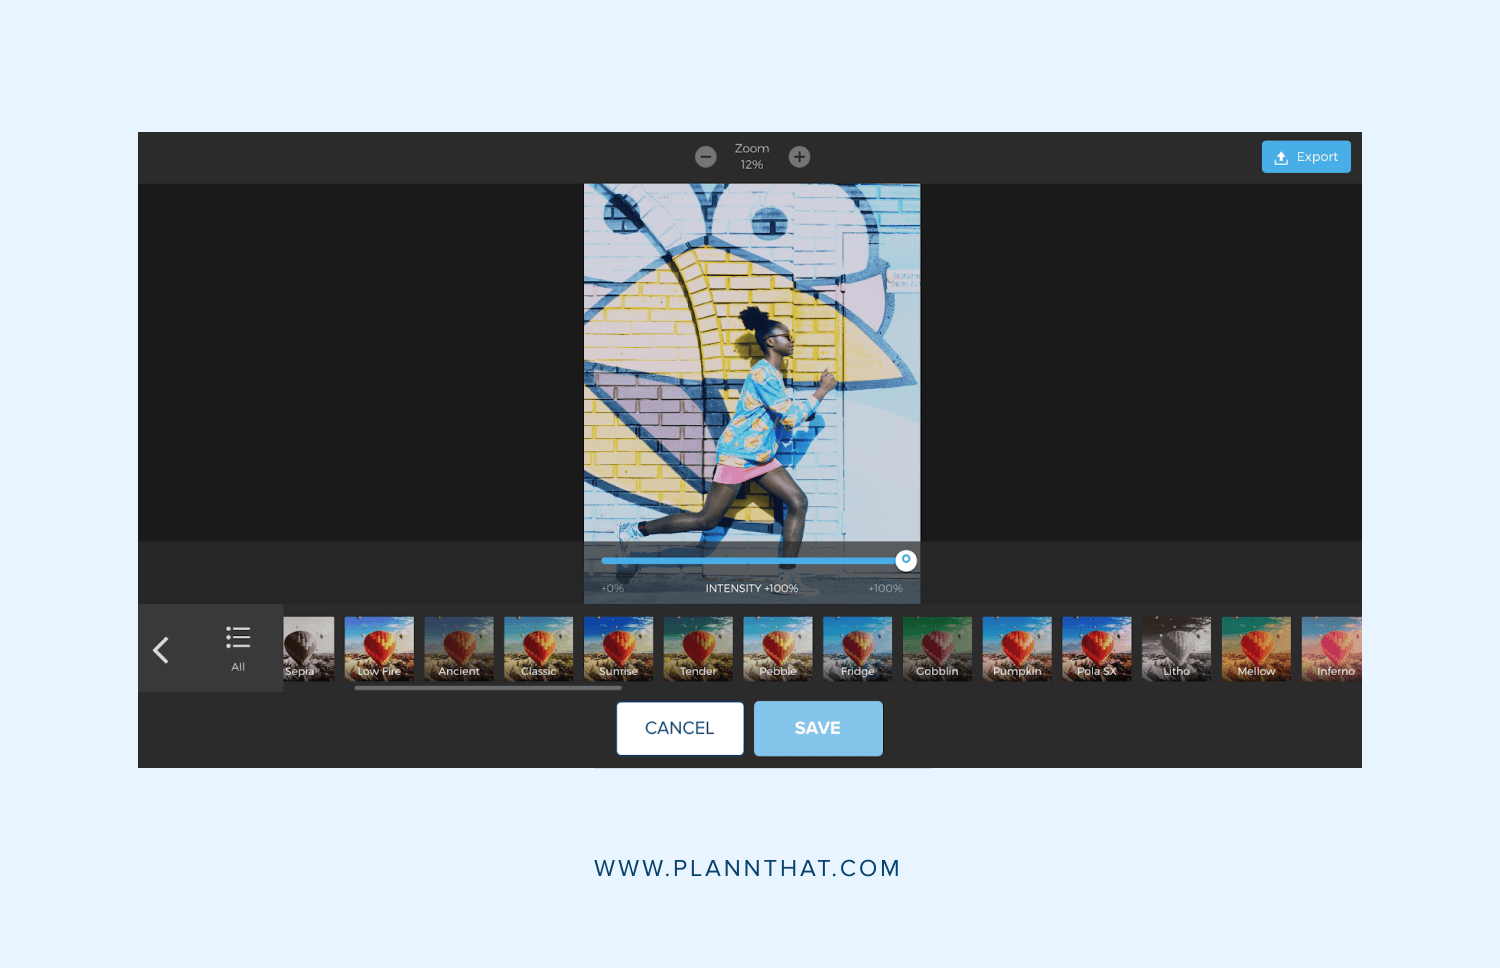 Here’s one of our fave editing tools to play with. Filters are often what takes a ‘fine’ photo to a fan-freakin-tastic one. They can make your photos stand out more, and make your feed more consistent (as using the same ones can help you achieve a similar aesthetic in your photos, even if one’s of your cat and the other is of a tropical island) Filters can work in a couple of different ways — some amplify the existing colors in your picture, while others apply more of a tint over the photo. You can use them to give your photo a warm and soft feel, or make it cool and icy. You can even make your pics black and white or sepia for an old school feel.
We have over 50 unique filters on Plann, so just experiment with applying different ones to your photo to find the one that works for you. But as a great starting point, you can click the drop-down menu that says ‘all’ for a selection of different filter aesthetics — such as moody, minimal, tropical and boho. This groups together all of the filters that will help you achieve that look. Another cool feature is the intensity slider, which you can move back and forward to control how intense your filter is.
Adjust
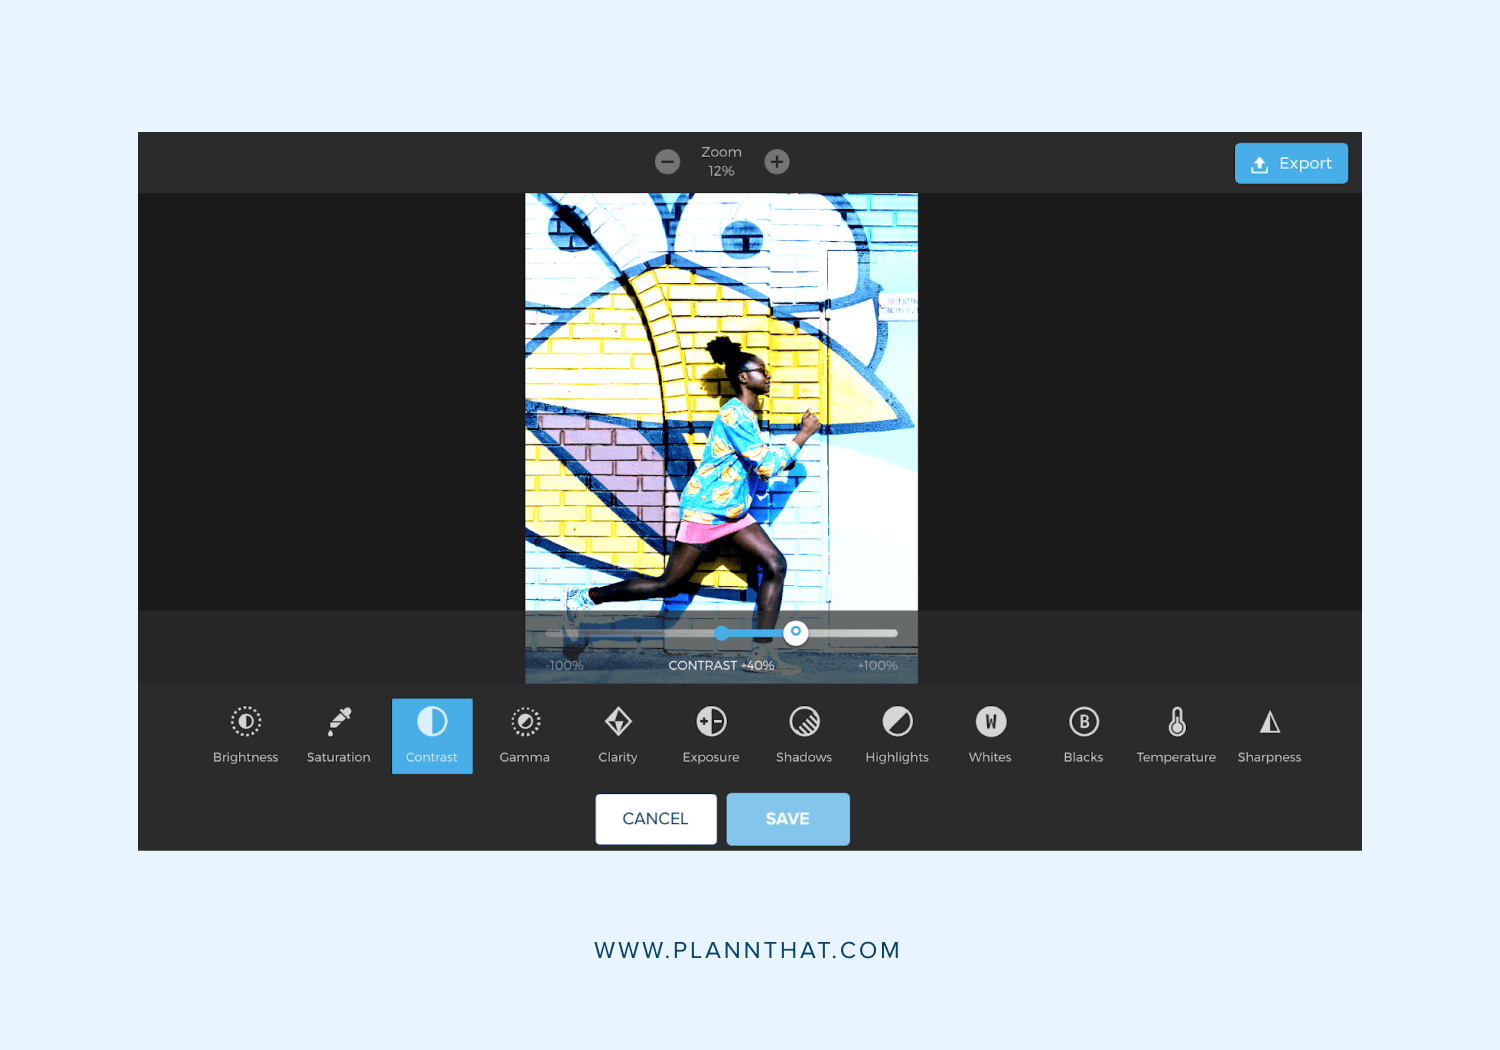
This is where a lot of the photo editing magic happens in Plann. While the adjustments may be subtle compared to say, filters, they can really make or break your photo. There’s a lot of different tools here, each of which do quite different things.
These are:
Brightness — This one’s pretty self-explanatory, but it affects the overall level of light in your photo. Move the slider to the left for a darkier, moodier feel and to the right for brighter and lighter
Saturation — This affects how intense the colours in your photo are. Closer to the left of the slider will give your photo a more muted feel, while to the right is more bright and vibrant
Contrast — This is the difference between light and dark in your photo. The more contrast you have, the more the details in your photo are going to stand out
 Gamma — Here’s a bit of a complex one! Gamma is the relationship between a pixel’s numerical value and its actual luminance. Basically, it’s how the human eye processes light. You may not see as much of a difference when moving this slider, but it does make a difference to how the viewer will perceive your pic.
Clarity — This adjusts the contrast in the mid-tones of the photos. Moving it to the left will more image clearer while to the right will make it grainier
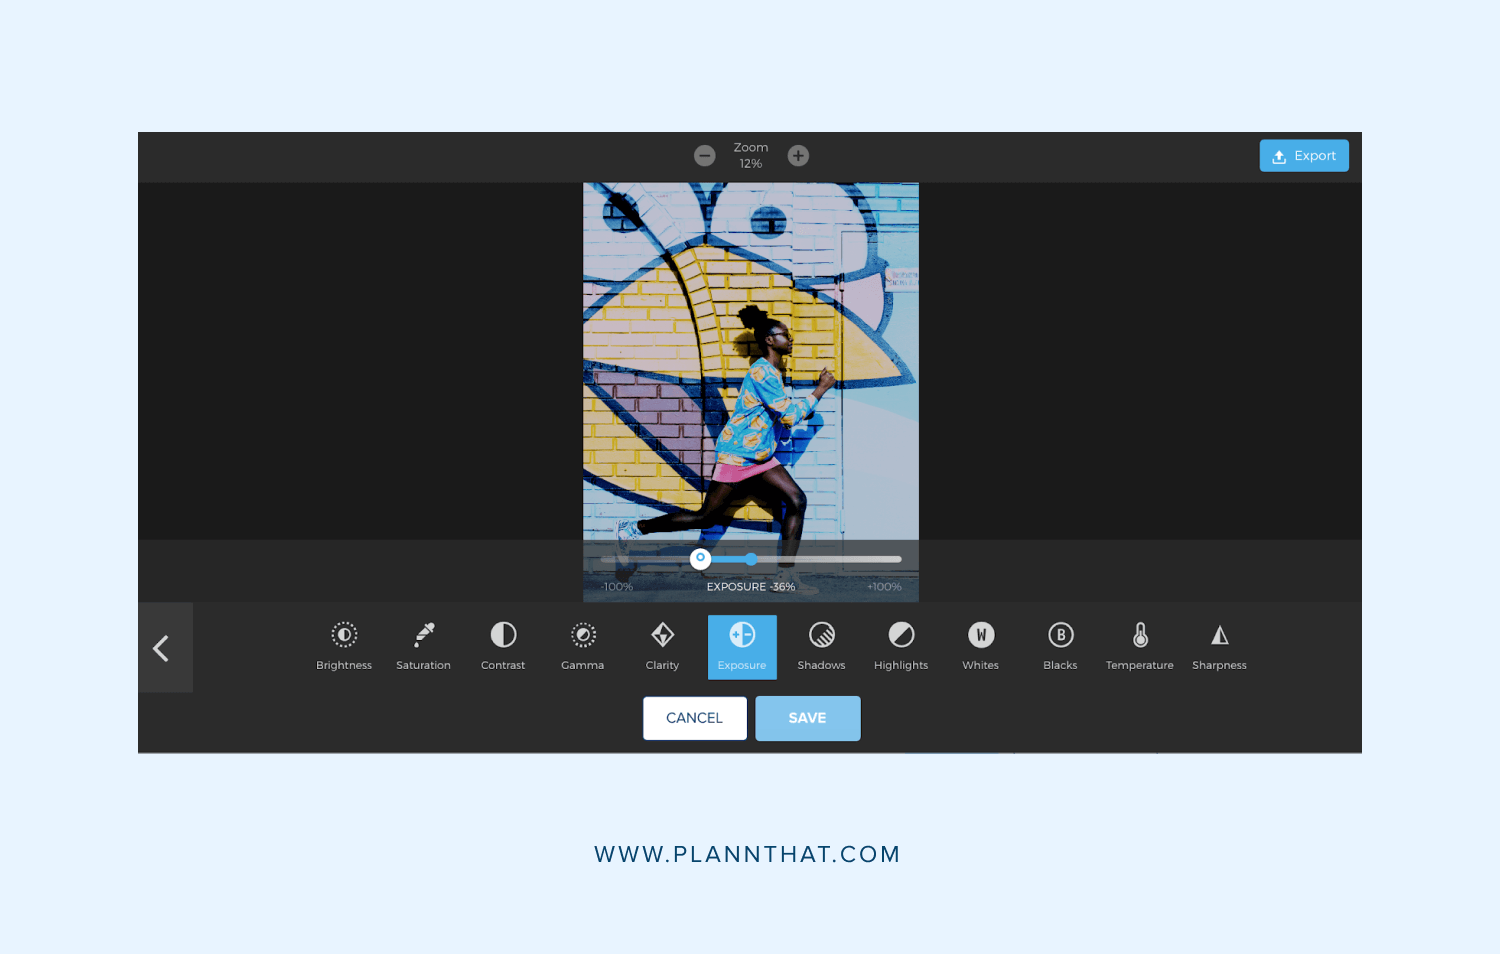
Exposure — This is the brightness of the heavier tones in your photo. While they may sound similar, it’s actually different to ‘brightness’ which affects the photo as a whole
 Shadows — This is how dark and pronounced the details in your shadows appear in your photo. You can bump it up to the right to add more depth and drama to your image, or move to the left to make it softer and dreamier
Highlights — The opposite to shadow, this adjusts the details in the highest points (in terms of light) in your photos
Whites — This tool pulls out any whites in your photo and makes them ‘pop.’ If you’re looking to achieve a very ‘whitewashed’ aesthetic in your pic, crank this bad boy up!
Blacks — This is the same deal as ‘whites’, but with the blacks in your photos
Temperature —This adjusts how warm or cool your photo is, while still keeping the specific colors that are in your photo
Sharpness — This is another way to adjust how clear or grainy your image is — while clarity affects the details in the mid-tone, this tends to affect the overall image
Text
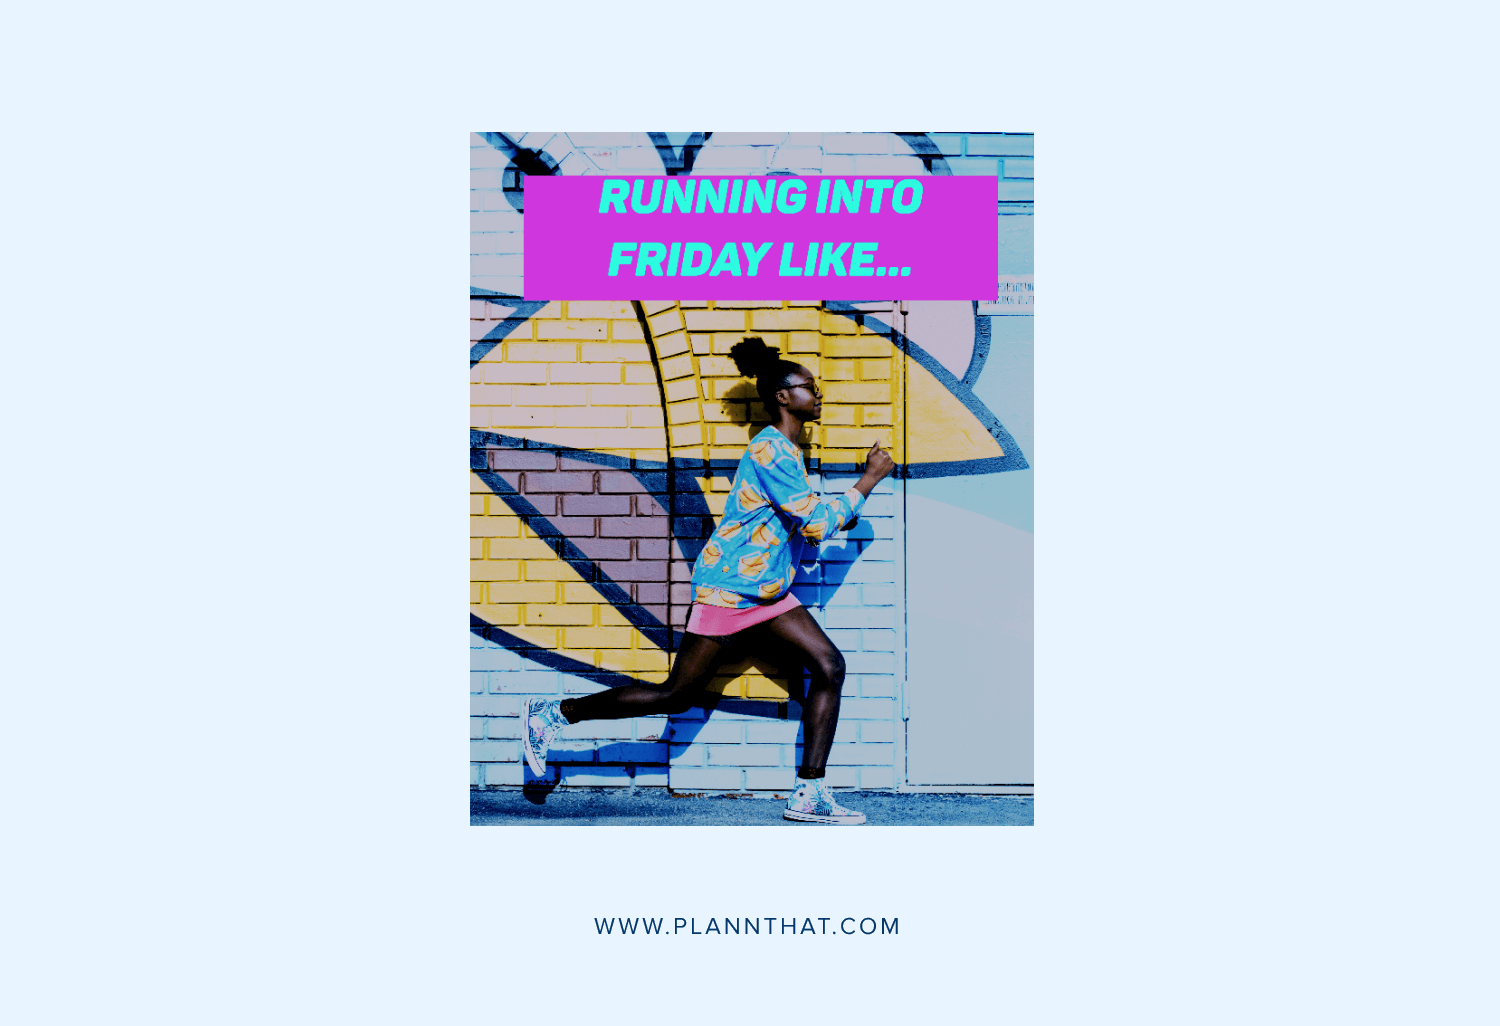 Sometimes, you just need text to get your message across and this handy tool allows you to do that without even leaving your Plann app! You just type in your text and it overlays it over your photo. To adjust where the text sits, just drag the clear box around the image. You can change the size and font of your text (there’s lots of different options to suit different brand personalities) as well as the color. To create a colored text box to make your type stand out more, click ‘foreground’, pick your color and bump up the opacity. You can also use the alignment tool to adjust where your text sits in relation to the middle of the image — left, right or centred.
Stickers
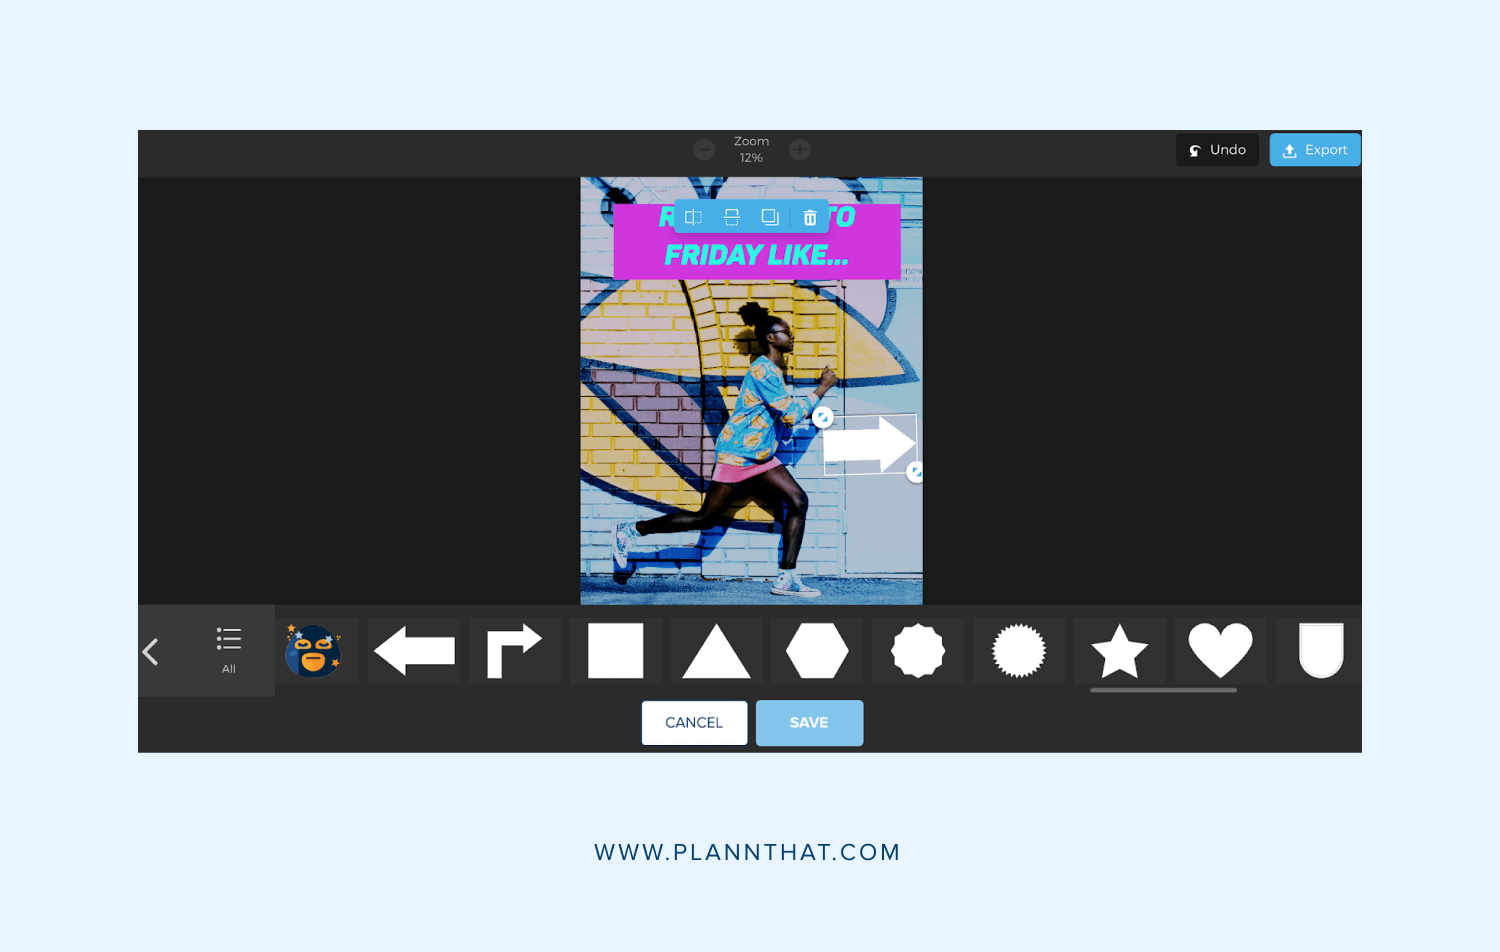 Sick of using the same ol’ stickers as everyone else on Instagram? Venture outside the box and use ours instead! In our ‘stickers’ tool, we have loads of unique sticker emojis to suit every occasion and mood. These are particularly great for if you’re creating stories, but don’t want to have to go in manually and add stickers when you’re posting. There are also shape stickers, which you can use to create designs and patterns on your image, or layer text over them (for example, the thought or speech bubbles)
Brush
 This is essentially a modern-day version of the OG design too, Microsoft Paint! You can use the paintbrush tool to add squiggles, shapes and handwritten text to your photos. It’s also handy for if you want to circle or point out a certain area in your photo. You can change the color of your paintbrush to whatever you like, and also use the slider to make your brush bigger or smaller.
Focus
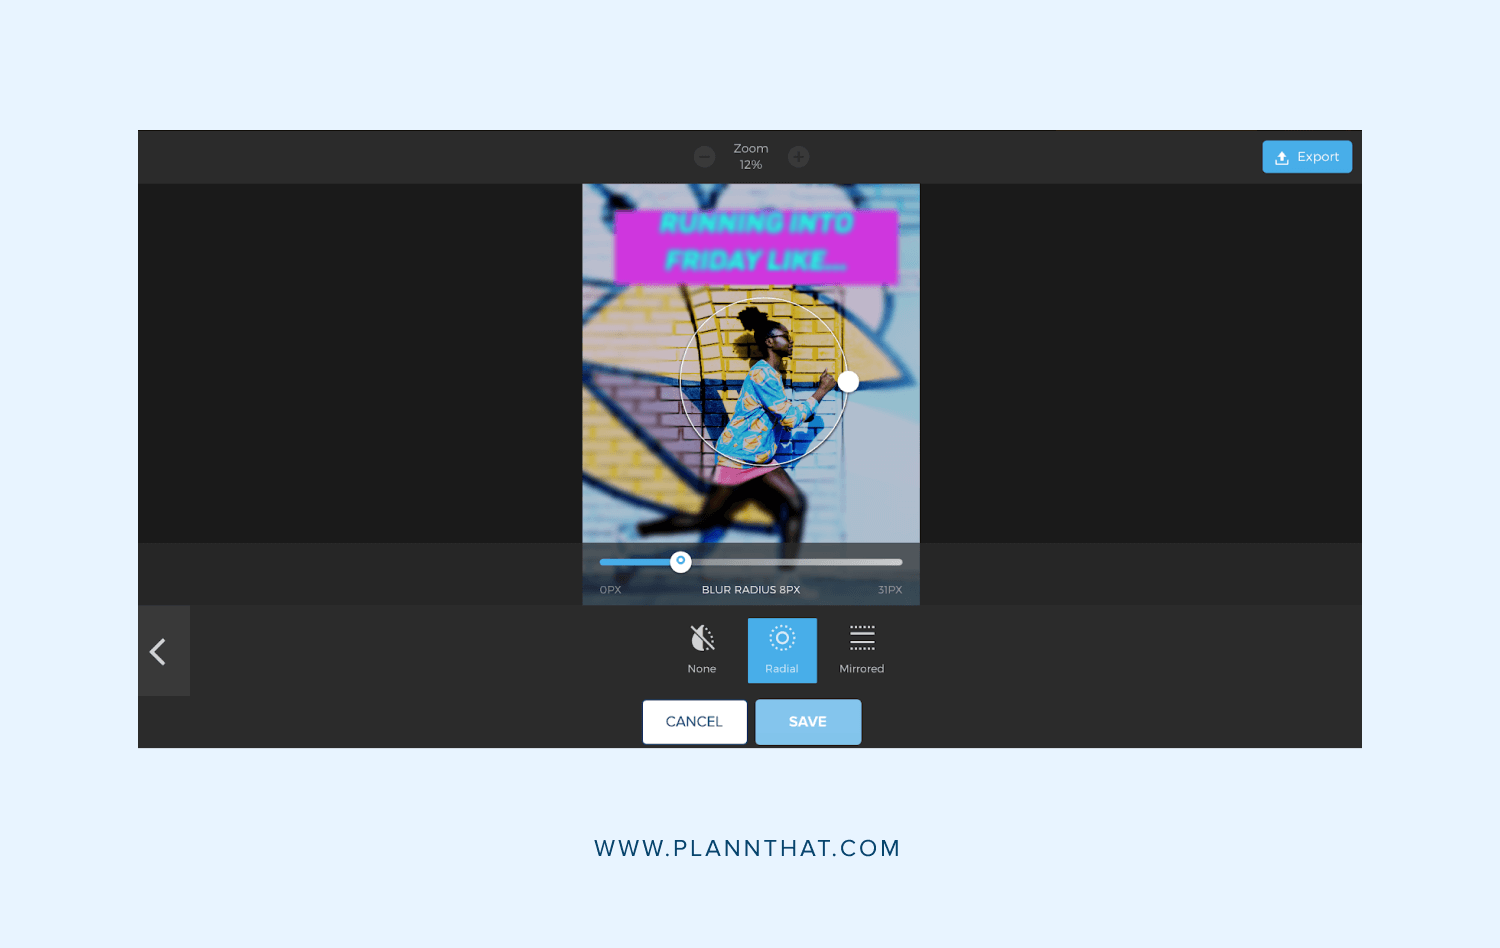 Here’s a tool that can really make you look like a pro photographer, even if you don’t know your aperture from your aspect ratio! We’ve all seen those photos that look super profesh, because the subject is in focus and the background is blurred. Yes, you can do this in ‘portrait’ mode on most modern smartphones, but you can also do it in Plann after your photo is already taken — and have even more control over it.
There are two different modes to play with here. The first is ‘Radial’ mode, which keeps a circle-shaped part of the photo in focus and makes the rest blurred. To change the size and location of the area in focus, just drag the circle. The second is ‘Mirrored’ mode, which gives you a rectangular-shaped tool to work with. Whatever is within this rectangle will remain in focus, while the content around on both sides will have a mirrored, blurred effect. Again, you drag the rectangular around, pinch its sides to make the affected area bigger and even turn it diagonally.
Frame
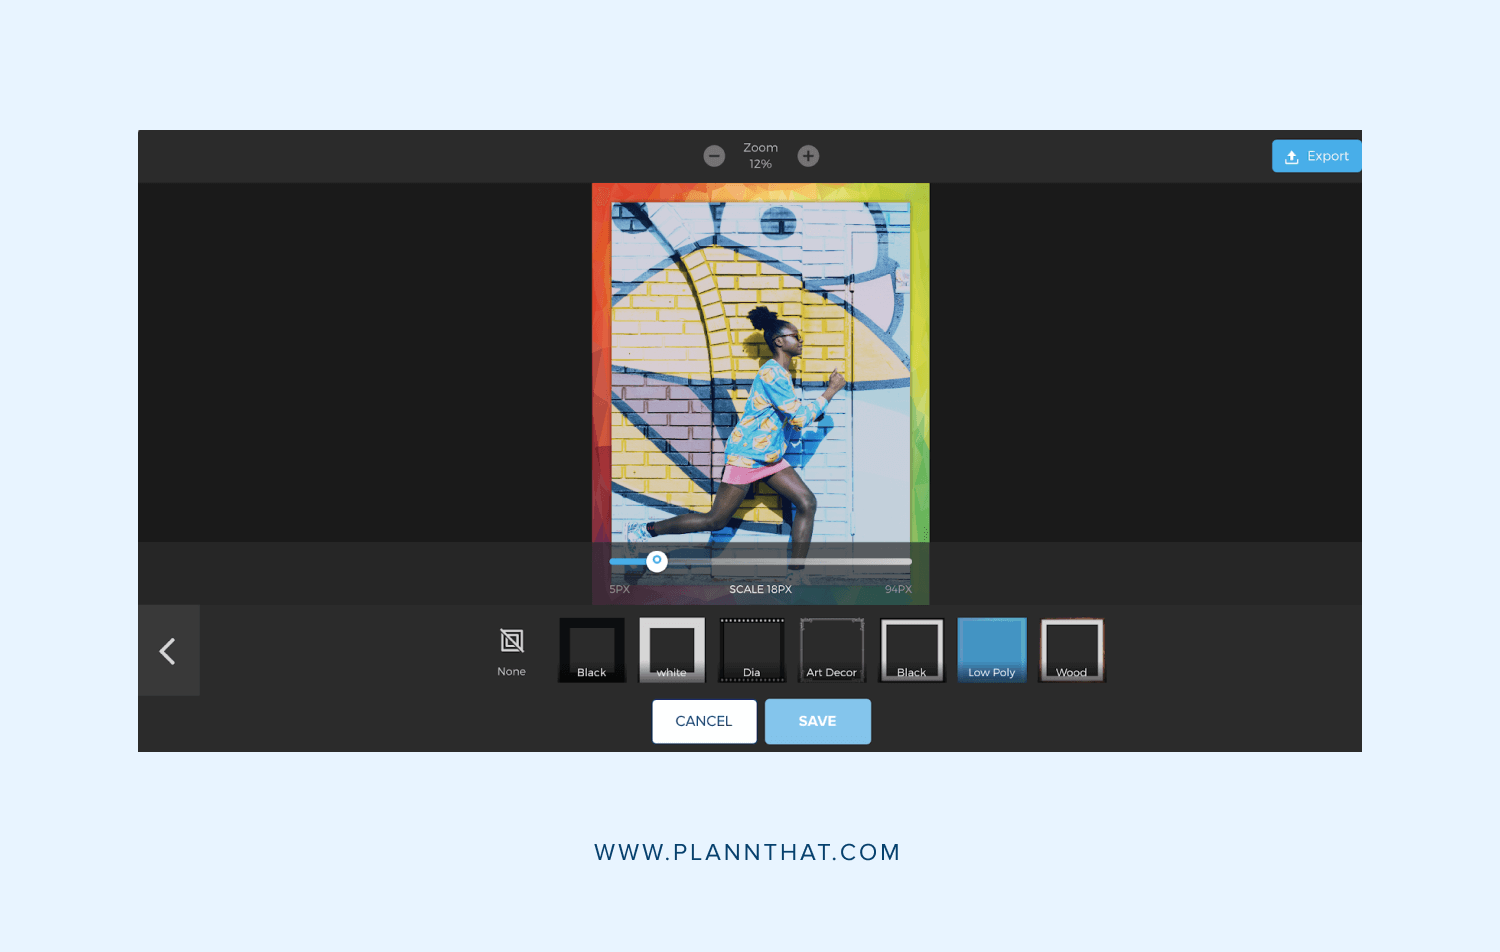 In school art class, we were always told that no piece of art is complete without a frame, so why should your Instagram posts be any different? In the frame tool, you can add a variety of different borders to your image. These can be used to help you create a different aesthetic. For example, the wood frame looks rustic while the Low Poly is more bright and fun! They’re also super useful for making your feed look more consistent, even when your photos have completely different colours and subject matters.
Fun fact: You can also use our ‘export’ tool if you’d like to use your creations places other than Instagram, such as in your branding or on your Facebook!
Remember, this is YOUR masterpiece. So, have fun with it and experiment
with the different tools to find the ones that work for your Instagram aesthetic.
Download Plann for FREE today to start creating your feed.