
Does editing photos for Instagram have you scratching your head and asking: “What sorcery is this?!” While it feels like it’s some advanced level Mage magic, creating drool-worthy pics for your feed is a lot simpler than you think.
All you need to do is master a few basic tools, and you can start editing like a pro! Plus, you don’t need a fancy editing software to produce Insta-worthy posts
Here are the best picture editing tips you need to know!
Snapseed: As one of the most popular editing apps, Snapseed is a good choice for Instagrammers who want to edit snaps on their phone. There’s a range of filters and tools to help you perfect your edit.
Lightroom: Lightroom is the best editing app for intermediate or advanced photographers. There is a paid desktop app, or you can download the free mobile app. Both give you more control over your final edits, and you can save your adjustments as presets to apply to all your images.

Now onto our unmissable editing tips….
1. Start with a Quality Shot
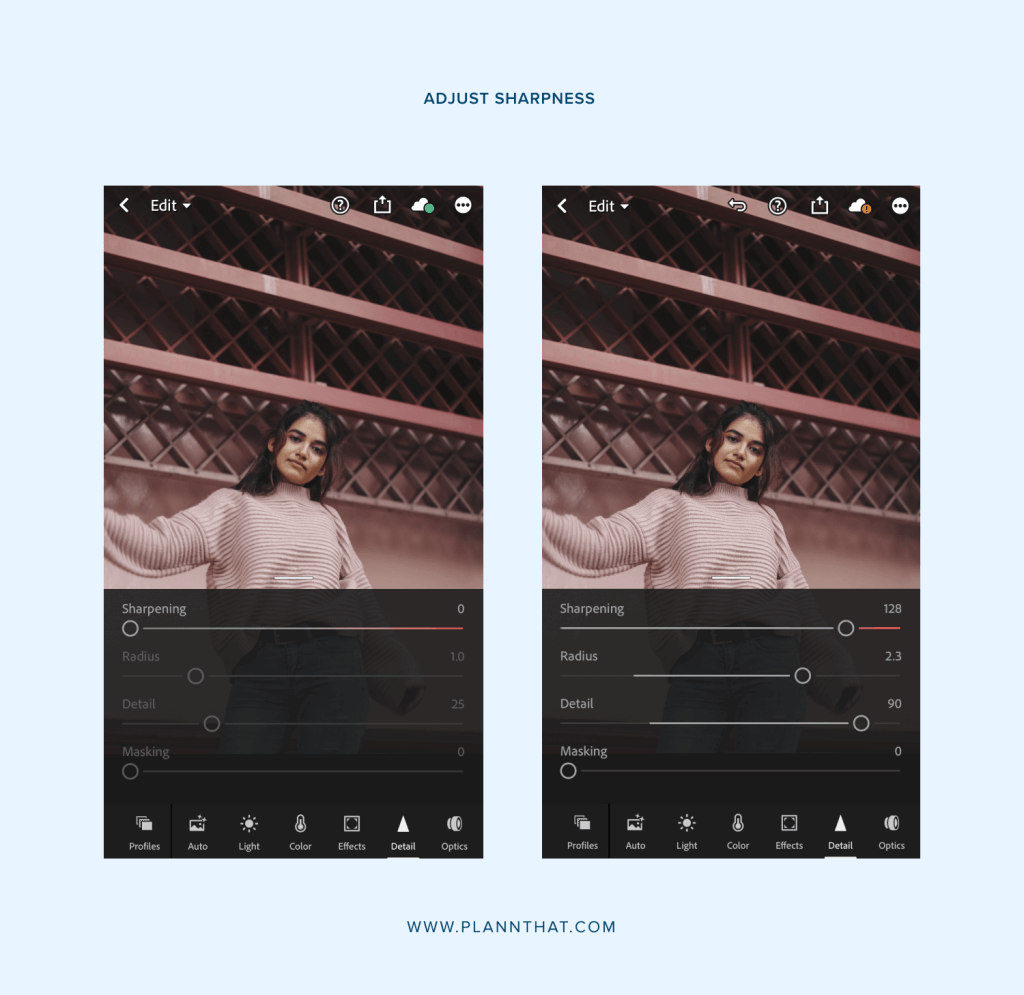
Before you can start editing your photos for Instagram, you need to make sure you have a quality shot.
Why?
Because no amount of color correction and exposure adjustments will improve a photo that’s blurry, grainy or poorly composed.
Here are some photography tips to help you shoot high-quality pictures:
- Shoot in natural lighting.
- Use the gridlines on your phone or camera to line up the shot.
- Invest in a tripod to shoot in low-light conditions and avoid camera shake if your camera doesn’t have a built-in stabiliser.
- Use the HDR mode on your smartphone to take more detailed shots without losing detail in bright or dark areas.
2. Use Crop & Straighten to Enhance Your Composition
Cropping is the easiest way to improve your photos.
It allows you to remove distracting elements quickly (say goodbye to those pesky photobombers), add more focus onto your subject and create drama with your composition.
Lastly, always make sure the horizon in your photo is straight! It’s a simple trick that will elevate your snaps from amateur to pro.

Tip! Crop your photos 1×1 for square images and 4×5 for portrait shots.
3. Spot-Clean Your Images
Do you have annoying dust particles on your photos? Use the spot-removing tool in your editing app to remove any unwanted blemishes.
You can use the same tool to remove stains from your clothes, a pimple on your forehead or any other distracting element.
If you want to remove bigger objects like people, you should invest in an advanced tool like Photoshop. It has several tools that can do the trick without leaving tell-tale signs behind.

4. Adjust the White Balance
Ugh.
Fluorescent lighting is the worst! It casts an awful yellow tint over images and drains out vibrant colors.
If you’ve snapped a pic indoors and you want to cool down the yellow, use the white balance tool. It will help you color-correct the overall tone of your image.
Play around with the sliders to increase or decrease the temperature of an image (think cool and warm tones), or you can adjust the tint sliders to add more green or purple hues to your image.
Don’t want to waste time fine-tuning the white balance? Editing apps like Lightroom and Photoshop have preset modes you can use such as “daylight” or “cloudy”.
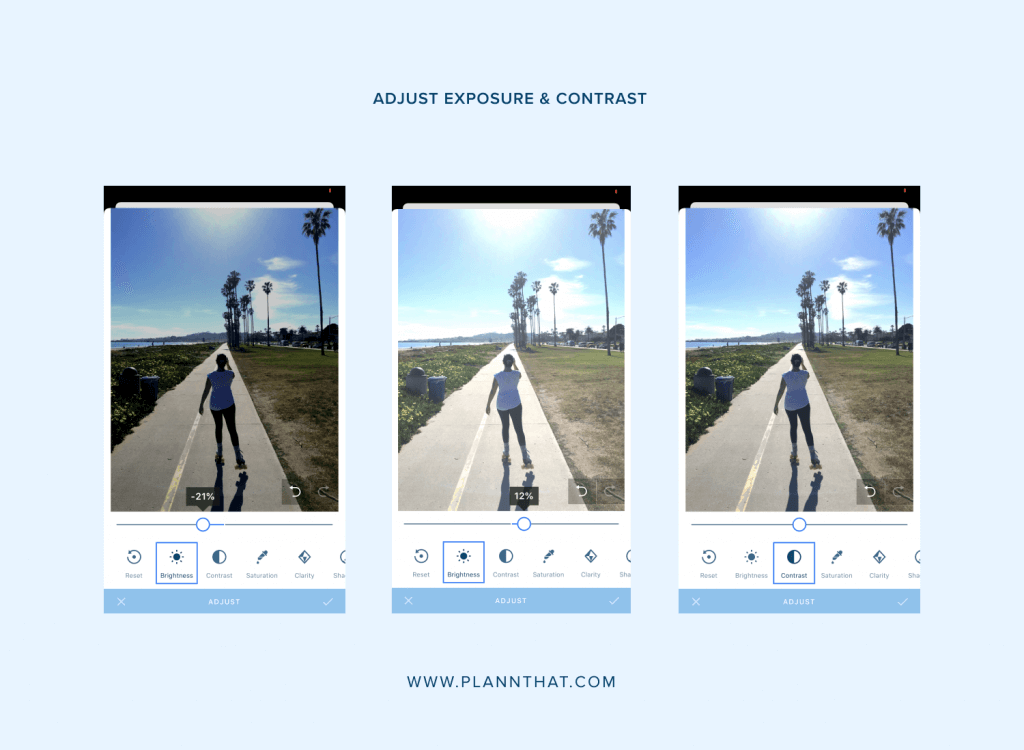
5. Adjust Exposure and Contrast
Exposure: If you’ve accidentally taken a photo that’s under or overexposed – all is not lost! You can use the exposure slider in your photo editing app to fix the overall darkness or brightness of an image. While adjusting the exposure, be careful not to blow out your image. You want to avoid those huge white spots.
Contrast: The next thing you want to adjust is contrast. Contrast lets you play around with the range of dark and light tones. You can use the slider to flatten images, so no elements stand out or pump up the contrast to make dark colors darker and light colors lighter.
6. Adjust Color Vibrancy and Saturation
Want to create a feed full of pops of color or a grid with softer with pastel hues? Use the saturation and vibrancy tools to increase or decrease the intensity of colors in your photos.
But you don’t want to go too crazy. Too much saturation and vibrancy will make your photos look unnatural. You want to adjust each slider marginally, so it enhances the original image.
7. Color-Correct Your Photos
Keep the tones in your grid uniform by color-correcting your photos.
Lightroom Mobile and the desktop version give you greater control over your edits by allowing you to adjust the hue, luminance and saturation for each color.
It’s the easiest way to make sure you always use the same tones in all your pics.
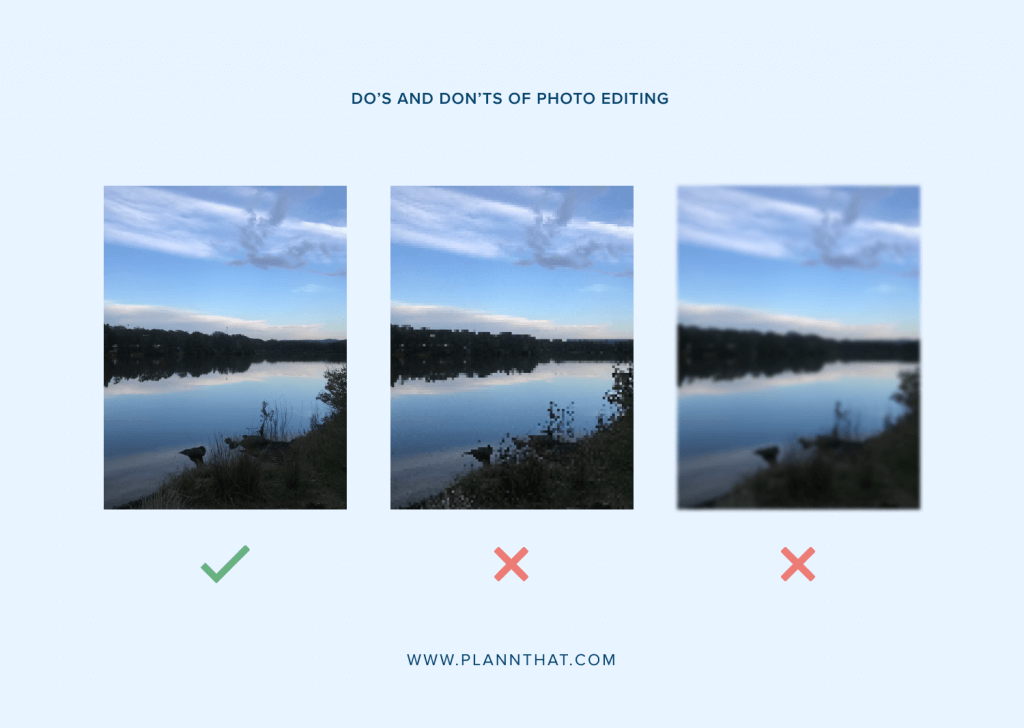
8. Adjust Sharpness
For a crisper, cleaner look, increase the sharpness of your photo. If you want a softer, more dreamy edit, decrease sharpness.
But you can’t use the tool to fix an out of focus object.
If there is a blur in your image, it’s there forever – no editing tool can help you save the picture.
As with the other tools mentioned, don’t adjust sharpness too much. If you do, your image will look out of focus or unnatural.
Ready To Edit?
Now that you know how to edit amazing Instagram photos, it’s time to start Plann’ing your feed!
We promise you, it will be life-changing!