Want the 26% of users who make purchases from Facebook ads to scoop up your products and services? It’s time to start targeting your audience with a little help from the Meta Business Suite!
In 2023 alone, Facebook’s total ad revenue reached a whopping $135 billion. Incredible! Facebook advertising is on the rise, and online shoppers are eager to buy. With the right skills and a strategic approach, you can direct consumers straight to your product catalogue.
Want to start selling products across Facebook and Instagram but feeling unsure where to begin? Here’s everything you need to know about setting up and using your Facebook Ads Manager account.
What is Facebook Ads Manager?
Facebook Ads Manager is a comprehensive ad account and management tool. The platform allows you to intuitively create and edit paid advertising campaigns, which are distributed across the Meta Suite to Facebook and Instagram.
Using Facebook Ads Manager, you can broaden your audience reach via a paid advertising strategy. Better yet, the system includes in-built monitoring and analytical tools to help you keep close track of content performance and conversion results.
For small businesses, Facebook ad campaigns can be the key to growing big. You can optimize ad sets to reach more of your ideal audience and build a reputation online. Hello, fresh engagement and sales opportunities!
Where Do I Find Facebook Ads Manager?
Facebook Ads Manager is easy to find when you know where to look. All you need to do is log into your personal Facebook account and navigate to your chosen Facebook page.
Log Into Your Page
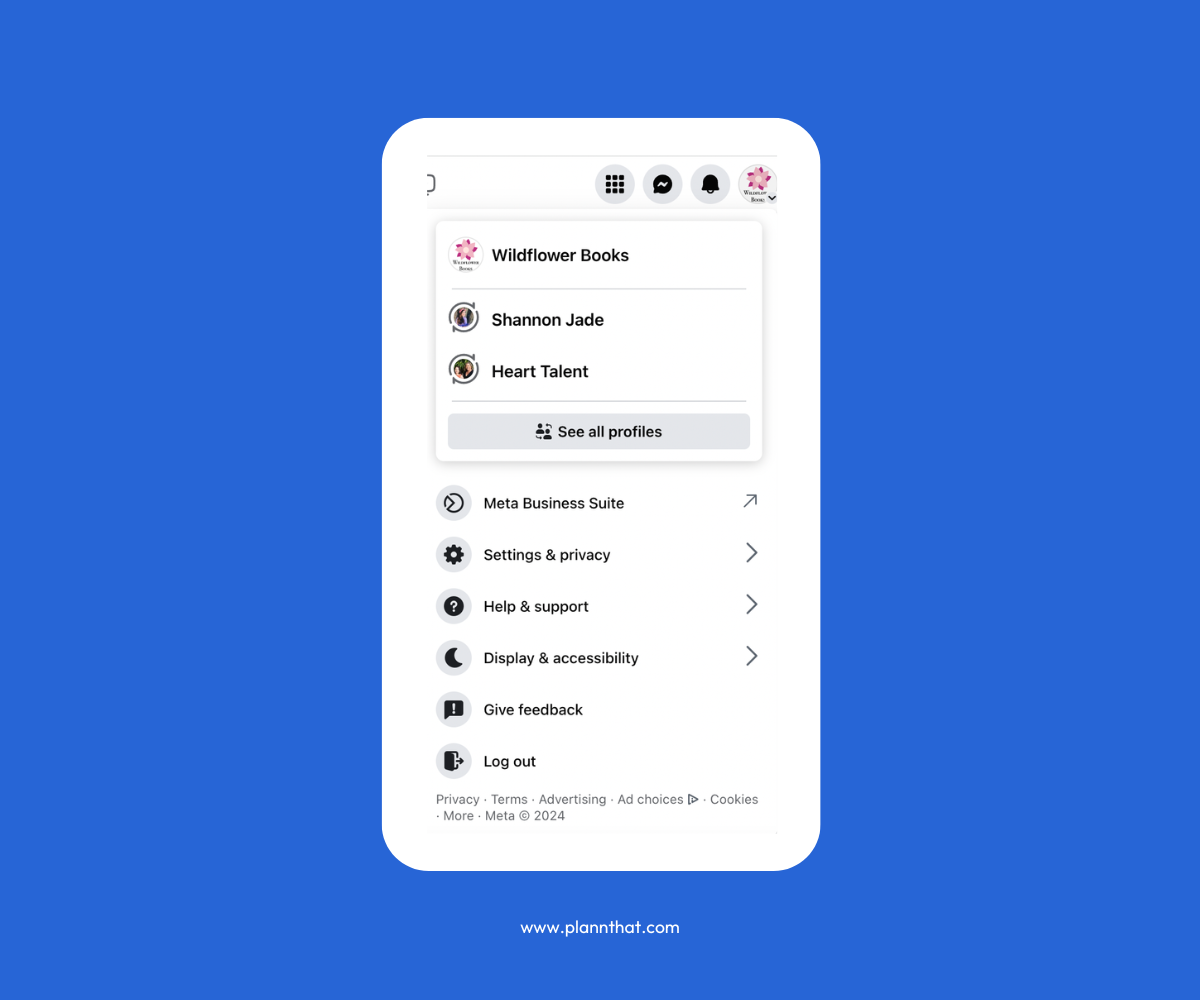
How to find Facebook Ads Manager
Once you reach your page’s timeline, head to the panel on the left side of your screen and choose ‘Ads Manager.’
Navigate Directly to the Ads Manager
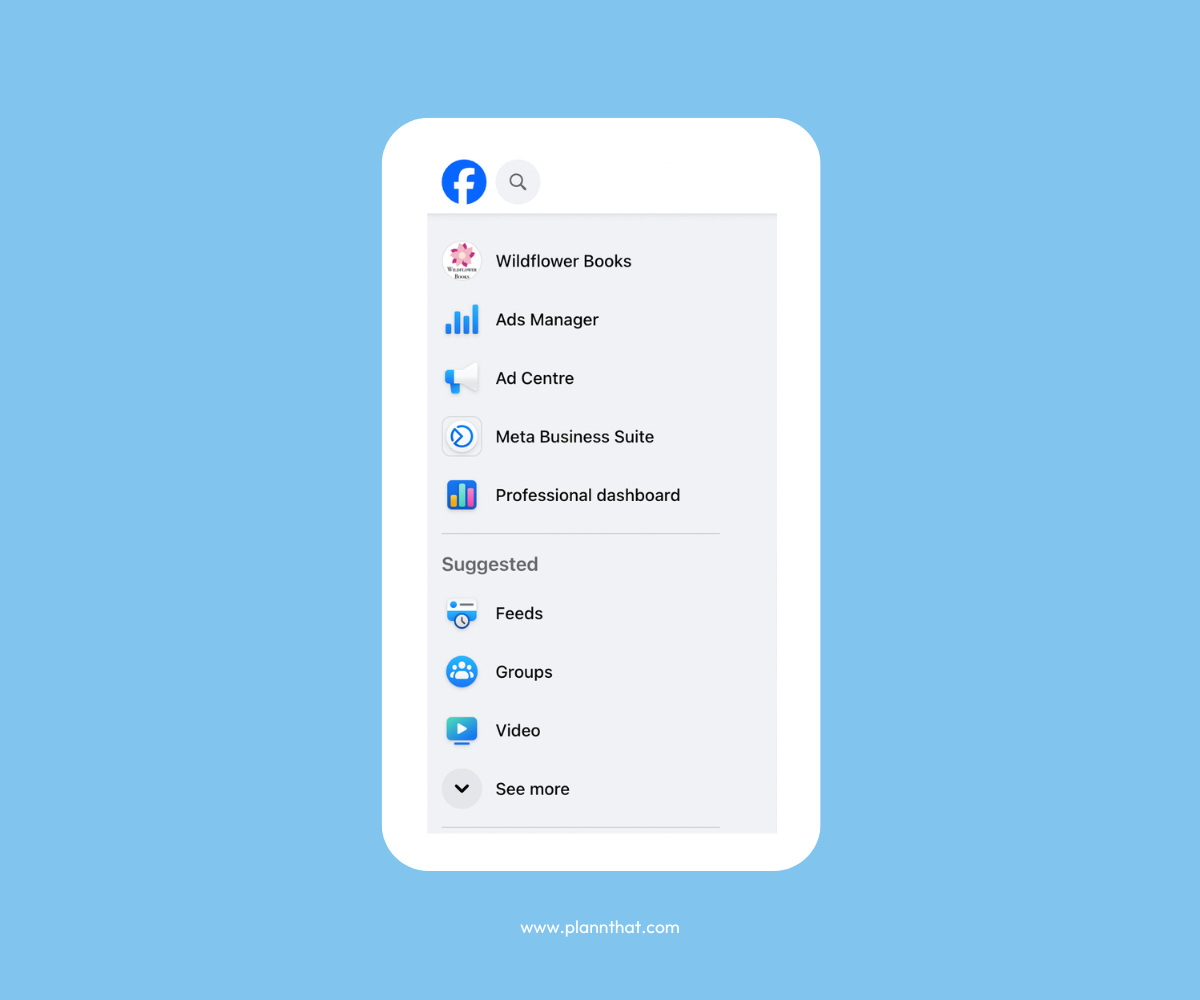
How to find Facebook Ads Manager
This will take you to your ad account, where you can manage new and existing ad sets and campaigns.
Explore Your Ad Account
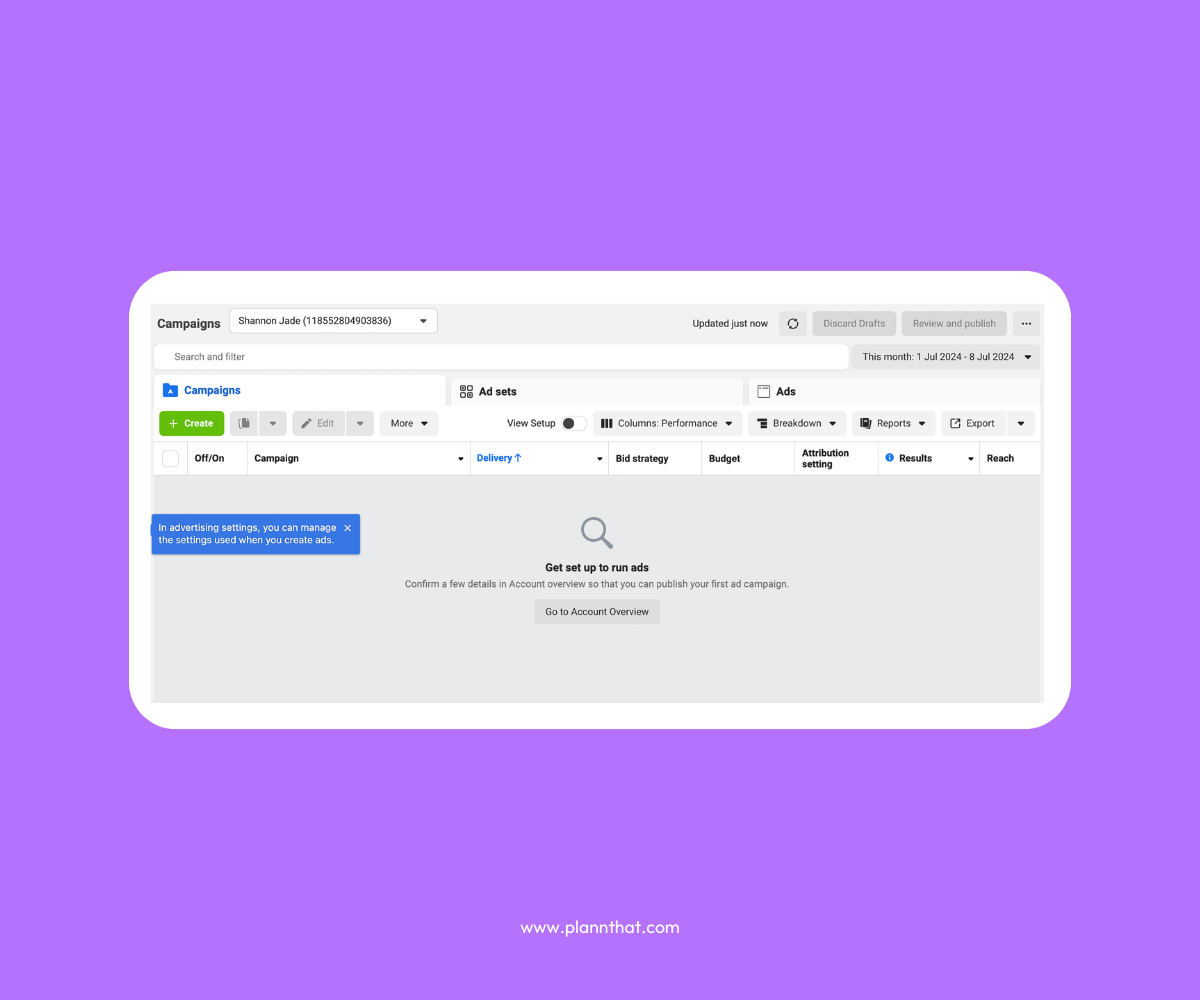
How to find Facebook Ads Manager
How to Set Up Facebook Business Manager for Your Facebook & Instagram
Ready to set up Facebook Business Manager for your Facebook and Instagram profiles? Follow these steps to get started and link your accounts.
Step 1: Go to business.Facebook.com, and click on the “Create Account” button.
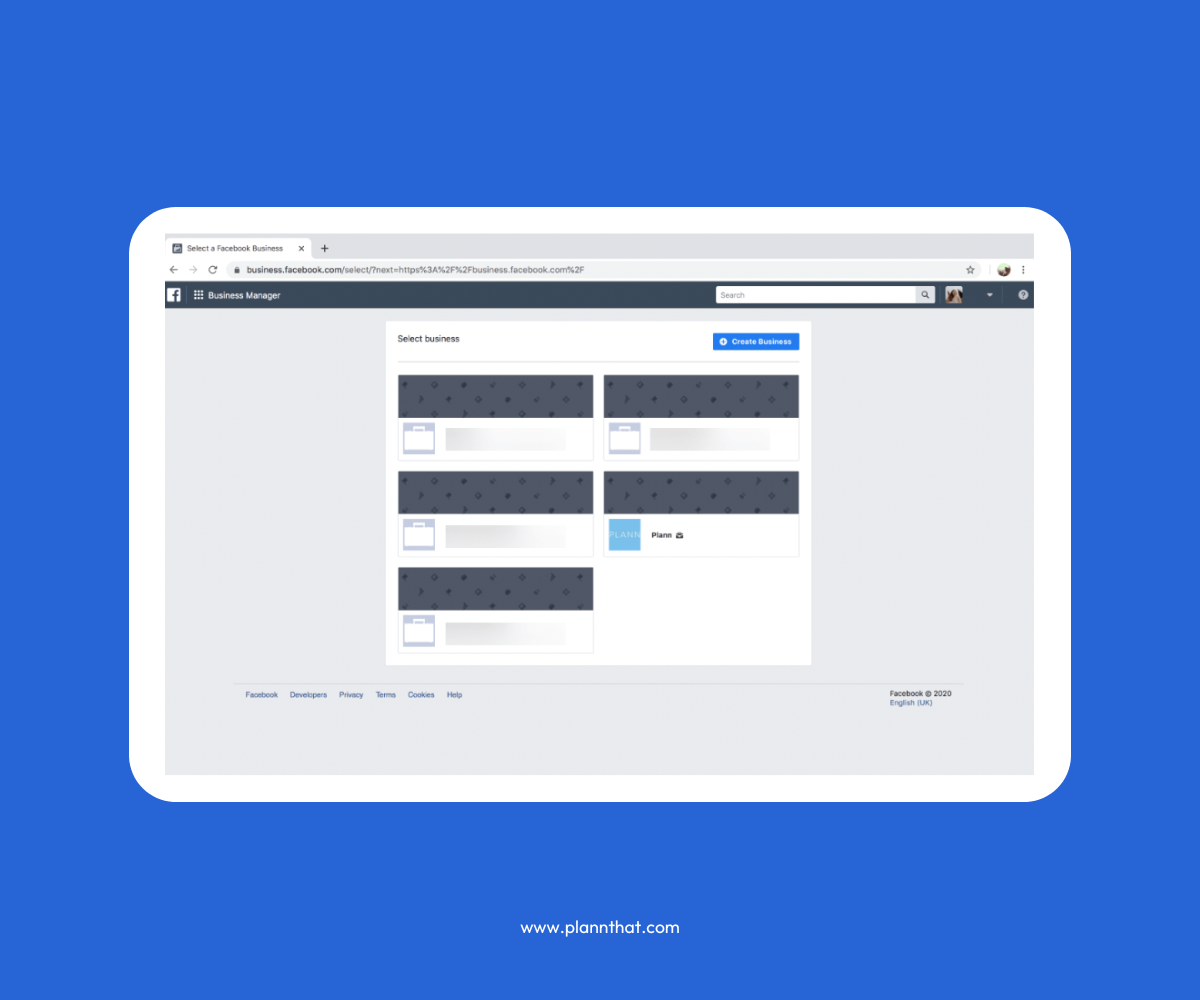
How to set up Facebook Business Manager
Step 2: Follow the account set-up prompts. You’ll need to enter your business details, such as address, phone number, and website.
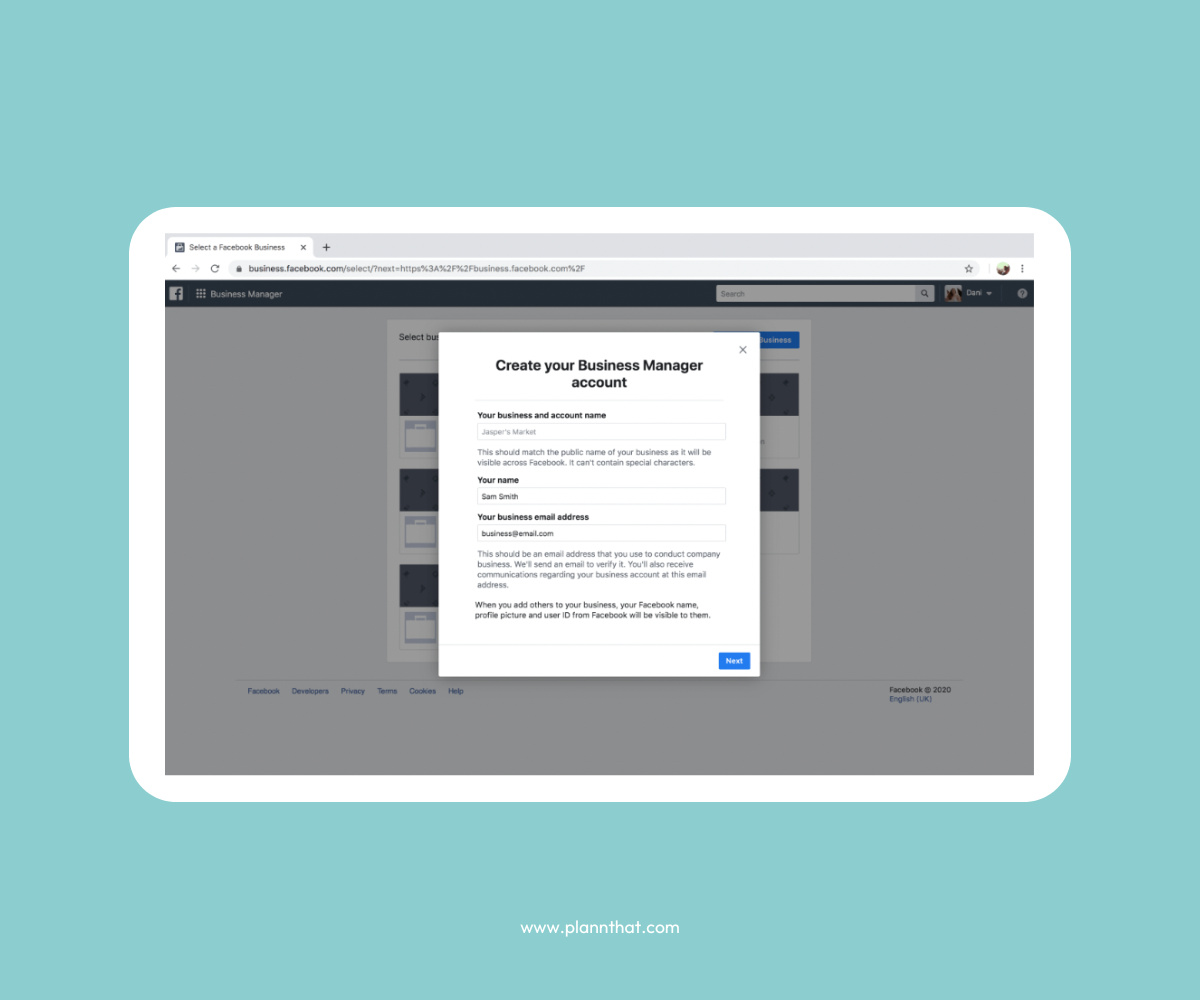
How to set up Facebook Business Manager
Step 3: Specify if you’re using Business Manager to promote your business or to provide a service (e.g. Facebook Ads Manager). When you’re finished, click “Submit”.
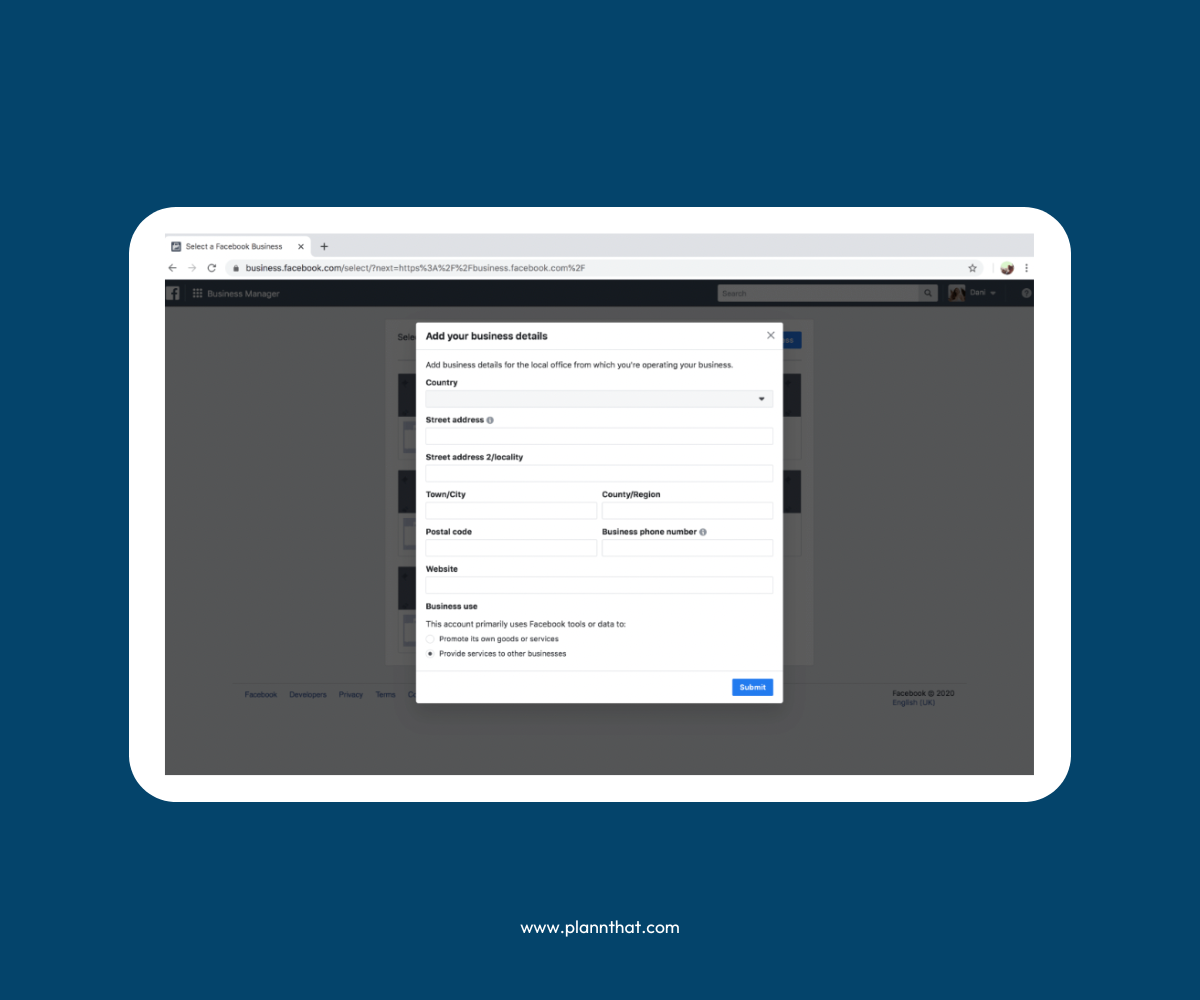
How to set up Facebook Business Manager
Step 4: To add your Facebook business page, look for the “Accounts” section on the left side of your business manager dashboard. Click on “Pages.”
Step 5: A second column called “Pages” will appear. Click on the “+ Add” button.
Step 6: You’ll have three options to choose from. Add a page you already own, request access to someone else’s page, or create a new page.
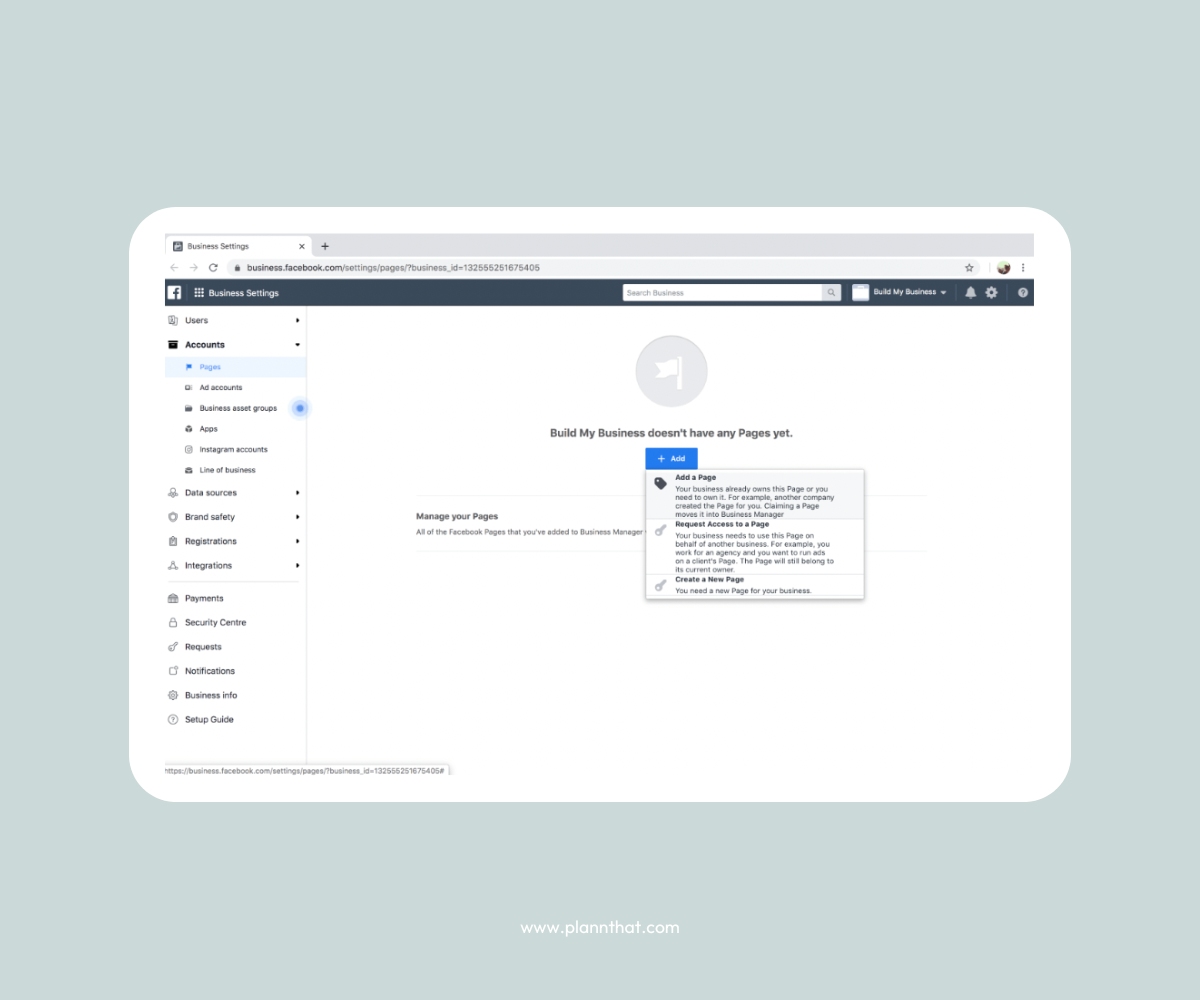
How to set up Facebook Business Manager
Step 7: Make your selection and follow the prompts. Your Facebook page will be connected to your Business Manager account.
Step 8: To add your Facebook ad account, from your Business Manager dashboard, look for the “Accounts” section on the left side and click on “Ad Accounts”. Click on the blue “+Add” button.
Step 9: Enter the Ad Account ID number associated with your account. You can find this in your Ads Manager dashboard. Click on “Add Ad Account”.
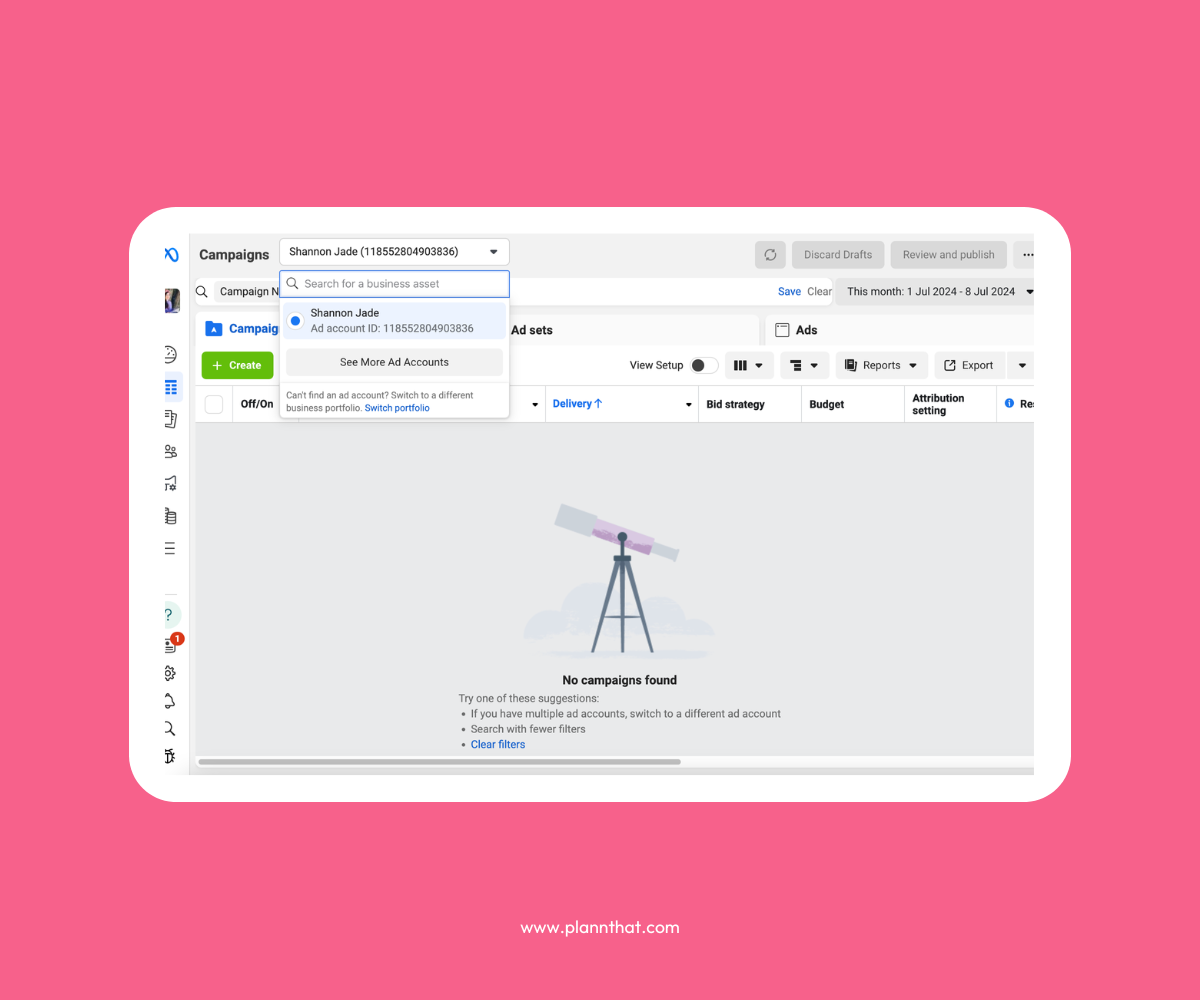
How to set up Facebook Business Manager
Step 10: If you don’t have an ad account set up, select “Create a New Ad Account.” If you want to access someone else’s ad account, select “Request Access.” Follow the prompts.
How to Use Facebook Ads Manager
Once you’re in the Facebook Ads Manager interface, you’re ready to start working on new ad sets and campaigns for your Facebook pages. Here’s how.
Step 1: To start a new ad campaign, choose “+Create” from the Ads Manager dashboard.
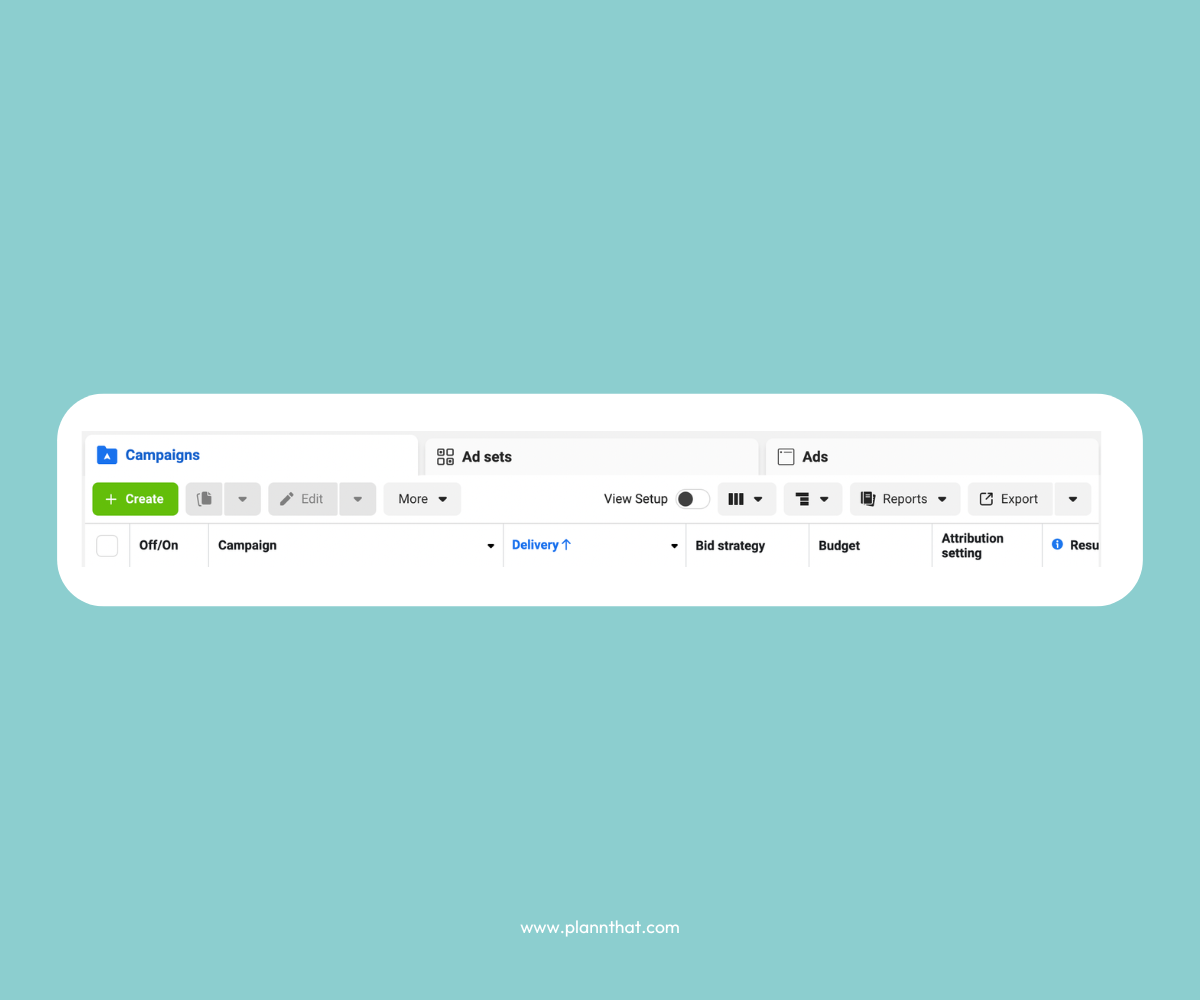
How to use Facebook Ads Manager
Step 2: Follow the prompts to select a buying type and campaign objective.
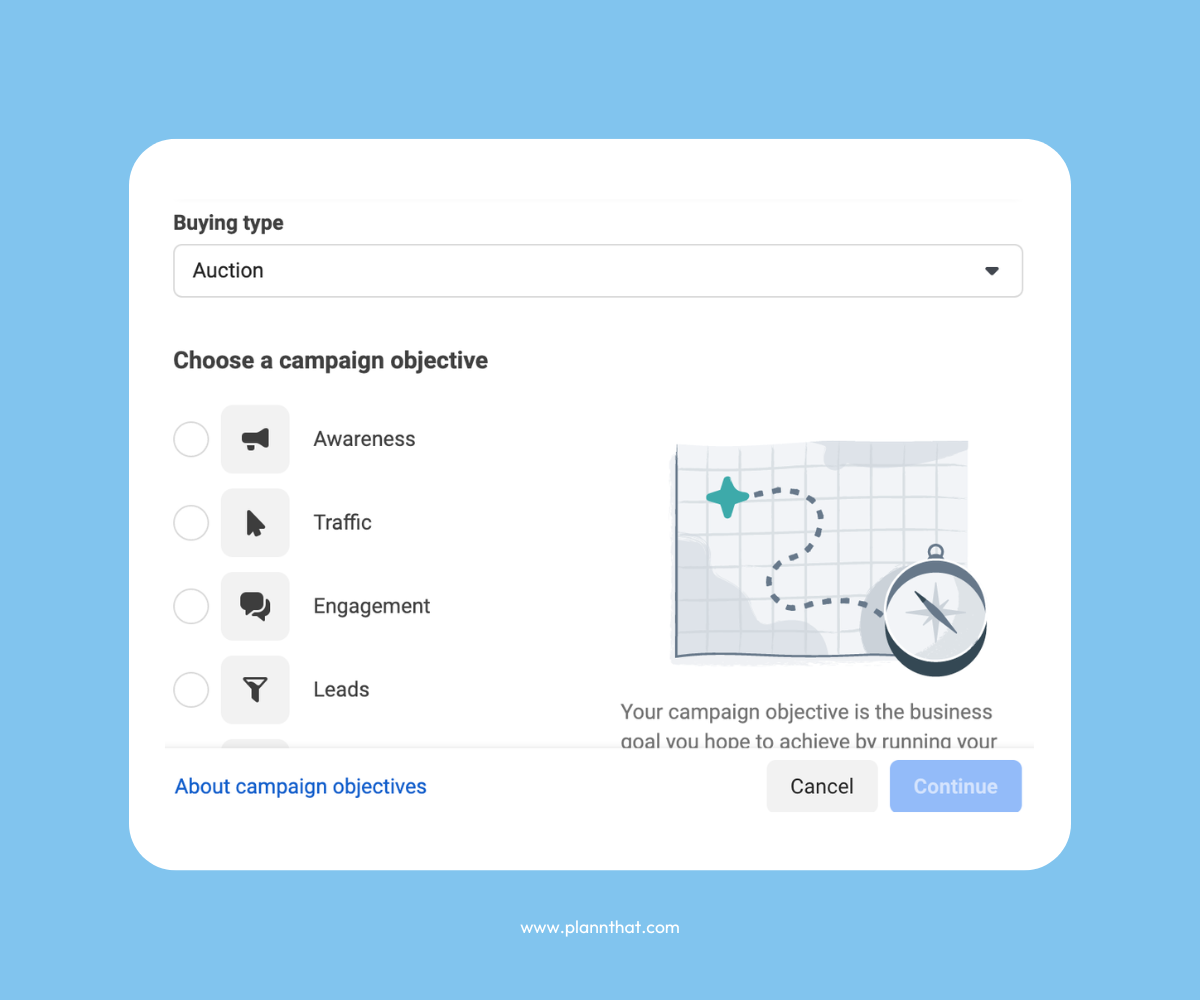
How to use Facebook Ads Manager
Step 3: As prompted, create a descriptive ad name, and select the right Facebook page and/or Instagram account to represent your business.
Step 4: Choose the format of your ad, opting for a single image, a carousel, a video, or a collection.
Step 5: Select “Add media” and upload relevant images or videos to fill your Facebook ad. If you’re running a collection ad, you’ll need to create a full catalogue.
Step 6: If invited to do so, choose an appropriate call to action button for your ad.
Step 7: Follow the relevant prompts to set up an ad budget and established any necessary audience parameters.
Step 8: Preview your ad set, and when you’re happy with it, click “Publish” to set it to live.
A Guide to the Different Types of Facebook Ads
There are many different types of Facebook ads, each with its own unique benefits and features! Check out your options before you start creating ads of your own.
Facebook Image Ads
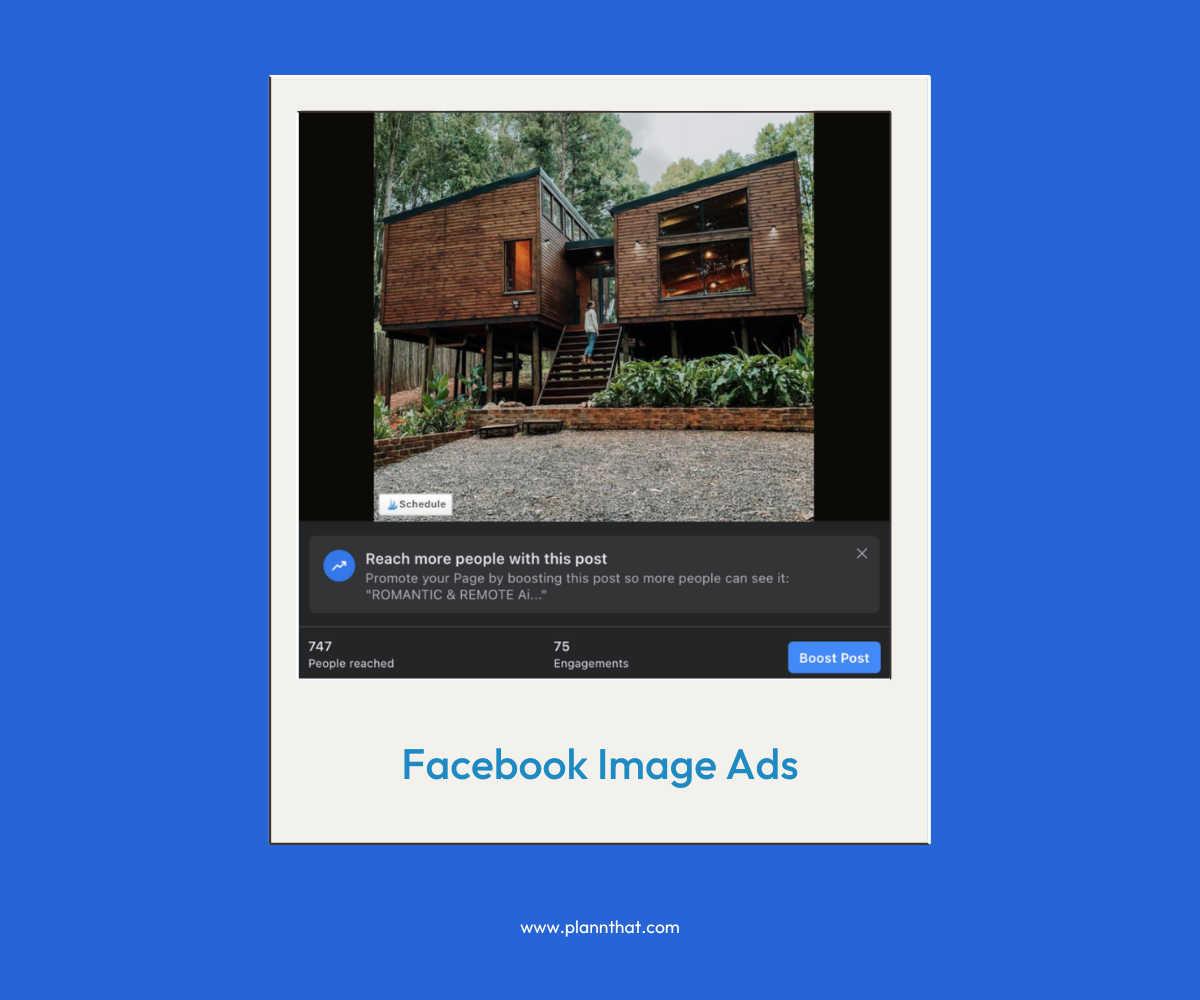
Facebook Image Ads Example
Image ads are a great way to make an impact, showing off the best of your products or services. In a single image, capture what makes your brand unique, and share it with the world. These ads are perfect for contributing to larger ad sets and establishing a compelling narrative around your business.
Facebook Carousel Ads
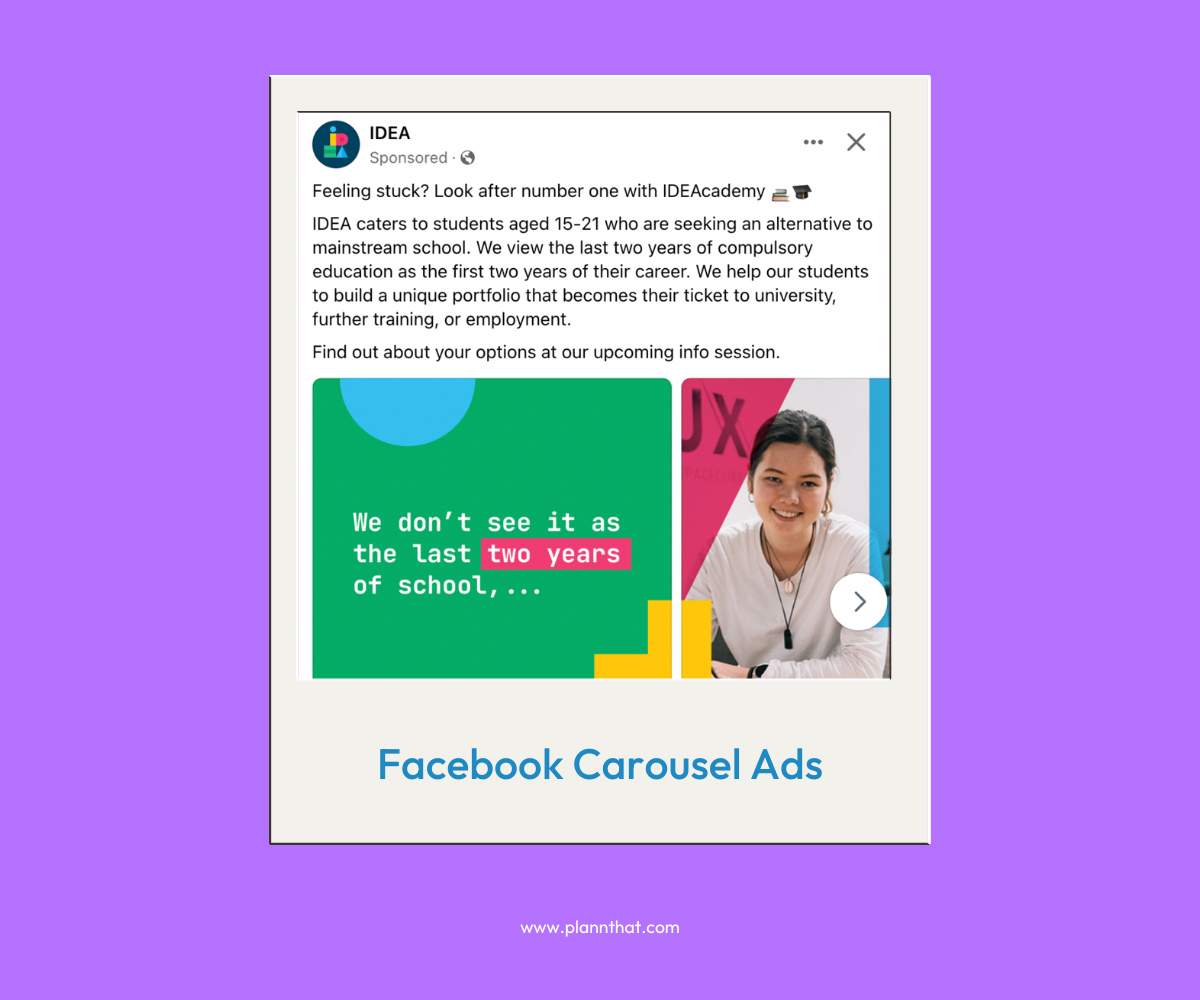
Facebook Carousel Ads example
Struggling to choose a single picture to represent your business? Carousel ads allow you to upload two or more images, with each picture displaying its own headline, description, and call to action. You can even link to different landing pages! This is perfect for an ad set with a little extra diversity and high levels of audience appeal.
Facebook Video Ads
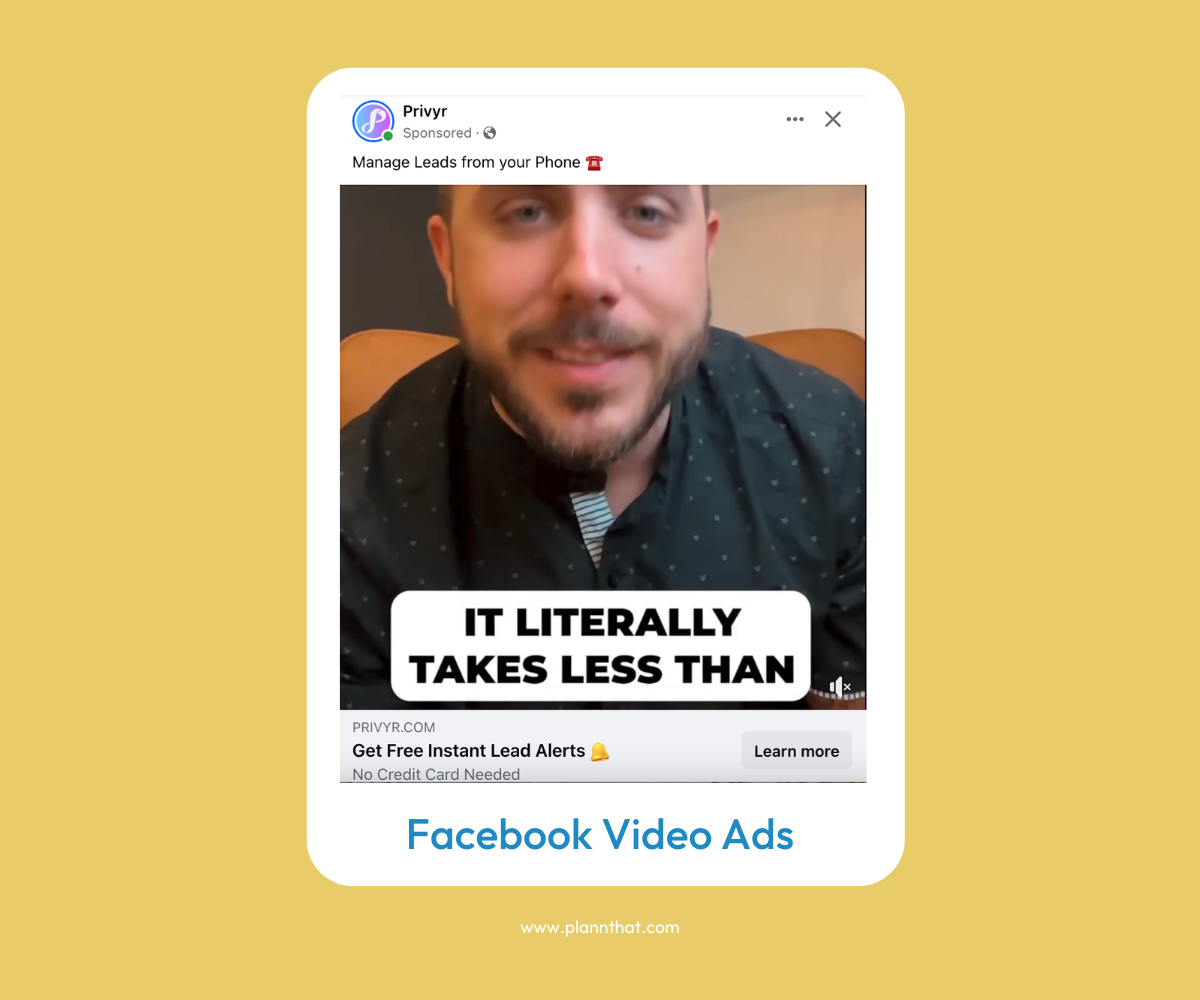
Facebook Video Ads example
Today, 98% of marketers consider video an important part of their strategies. Facebook video ads allow you to harness the power of video marketing and create rich, highly engaging ad sets that speak directly to your audience. You can create fresh, original, and entertaining video materials that encourage users to click for more information.
Facebook Collection Ads
Want to create a diverse ad set? Facebook collection ads allow you to craft an immersive journey. These ads include a cover image or video, followed by three product or service images. When users click on your ad, they’ll unlock an Instant Experience landing page, where they can engage and learn more about your brand.
How Much Do Facebook Ads Cost?
If you’re new to the world of Facebook advertising, you might be wondering how to set realistic expectations around your ad budget. Here’s how pricing works.
You can get started with Facebook advertising regardless of your cost limitations. You always retain control over your ad spend, inputting this threshold before your ad even goes live. Meta ads are priced based on a few key metrics. What you pay will usually depend on the goals you set for your ad set.
CPC determines the cost per click and stipulates a small fee applicable every time someone clicks on your Facebook ad. CPM, on the other hand, measures cost per mile and represents the price you pay per 1,000 ad impressions, regardless of how users interact with your campaigns.
Factors that influence the cost of Facebook ads
When it comes to running effective Facebook ads, you need to understand how to maximize return on investment. A range of factors can influence costs.
Quality Content
First, consider your advertising visual and text materials. Compelling copy and images are essential if you want to encourage conversions. Get it right, and your ads will make more of an impact, ultimately delivering a better return.
Audience Targeting
Target your audience the right way. Make sure you’re setting up automatic placements for the right demographics, and taulor your advertising materials to suit your target market.
Placement Options
Your ad placement can make a big difference. Get to know how your audience responds to advertising content, and place your ads accordingly. This might mean focusing more on Facebook or Instagram, or it could mean running mobile-friendly ads more often.
The Next Steps
A clear call to action should lead viewers to the right destination. Make sure that your ads include relevant and engaging clickthrough links. Your next steps should take your audience directly to the next phase of the consumer journey.
How to Add a User to Facebook Business Manager
Assigning roles and permissions on your ad account is important, as it allows you to control who can make changes to your Facebook page and active ads. Here’s how to add another user to your business manager account.
Step 1: Go to Ads Manager settings.
Step 2: Navigate to “Ad account roles,” and select “Add people.”
Step 3: In the box provided, enter the name or email address of the user you want to add.
Step 4: Using the dropdown menu, assign the new user’s roles and permissions across your account and ads profile. Then “Confirm.”
Best Practices for Facebook Ads
Keep these best practices in mind to create ad sets that make an impact!
Harness A/B Testing
A/B testing allows you to easily compare similar ad sets and ideas. This can help you identify which structures work best for your audience. Before you invest big in a single advertisement, don’t be afraid to mix and match your approaches. Learn which layouts are most likely to help you achieve your goals, then invest your funds wisely.
Analyze Ad Performance
Analyzing campaigns can help you better understand each new campaign you aim to create. Before you get to work on fresh advertising content, review multiple ad sets to get a sense of performance metrics. Which ads achieved the best reach, engagement, and conversion results? How can you use these insights to inform future content creation?
Edit and Optimize Ads
Finally, edit ads and ad sets! As you learn more about your audience and the ads that work best, revisit your Meta ads manager, and make changes to optimize your campaigns. This can help you ensure you’re targeting materials as effectively as possible for optimal ROI.
Schedule Facebook Posts with Plann
Using Facebook Ads Manager, you can rely on high-level yet easy-to-use advertising tools that help you reach out to an engaged and relevant audience.
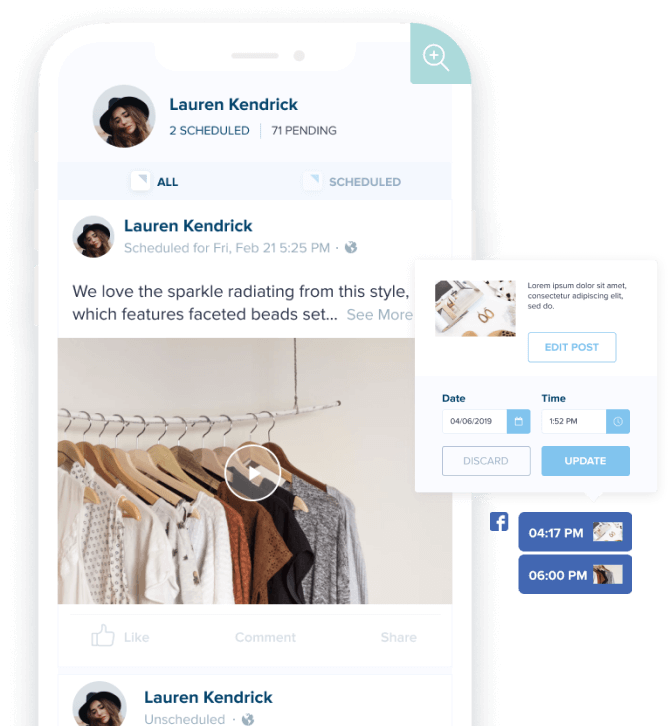
Ready to get to work on a more powerful Facebook presence? Start scheduling Facebook content with Plann! Sign up today for a FREE 7-day trial.
