Every day, Instagram Reels become an even more important part of the Instagram platform, which means there’s never been a better time to get on board with video content.
As Instagram continues to prioritize video media, Reels offer a unique chance to grow your account, reaching new users from around the world. That’s not to mention all the amazing engagement benefits Reels can provide. With Instagram Reels, you can communicate with your audience in new and creative ways that help your brand shine.
For even the most experienced Instagrammers, making the transition to Reels can feel overwhelming, especially if you’re unfamiliar with Instagram’s video editing tools.
Fortunately, you’re never alone! Here at Plann, we make it our job to stay up to date with the latest social news so that we can keep you in the loop.
Wondering how to edit Reels on Instagram and achieve your social media goals? Here’s everything you need to know.
What are Instagram Reels, and Why Do They Matter?
Reels are Instagram’s answer to TikTok, and they’re fast becoming a staple for success on the platform. Increasingly, the Instagram algorithm is promoting video content over image posts. This means that Reels could soon be the only practical way to grow your Instagram presence.
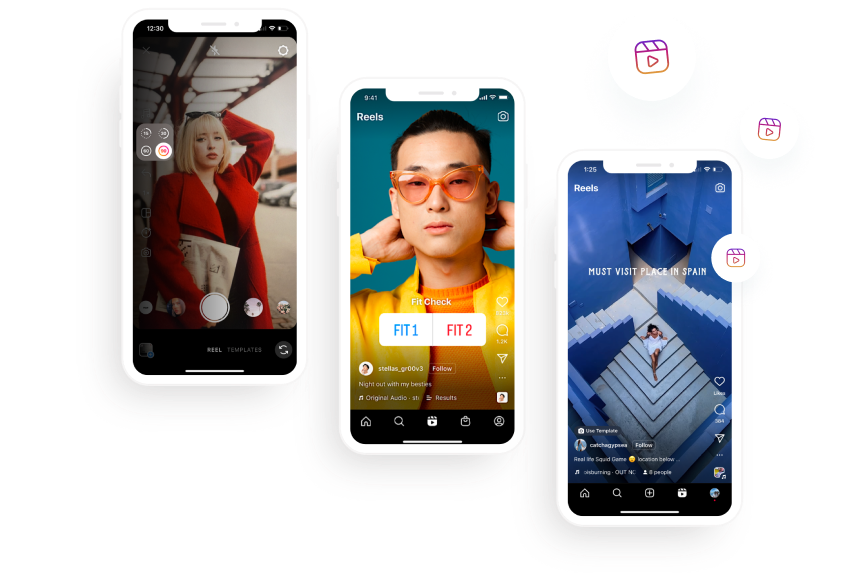
By allowing users to share short-form video content up to 90 seconds long, Reels allow you to showcase your expertise, build trust with your followers and convert them into paying customers using the power of video content. By including Reels as part of your social strategy, you can share more of your brand on Instagram.
As more users become avid Reels watchers, you can expect to benefit from additional reach opportunities. While image posts are mostly shared among your existing followers, Reels are an easy way to find new users outside of your existing network (thanks to the Reels discovery tab and Instagram’s Explore page).
How to Edit Instagram Reels
If you’re new to Instagram Reels, you might be feeling a little lost when it comes to video editing. The Instagram app offers great in-built editing tools that allow you to create and share high-quality content. Here’s your step-by-step guide to the tools and skills you’ll need!
Filming Reels Content
Once you know what you want to film an Instagram Reel, the first step is capturing content!
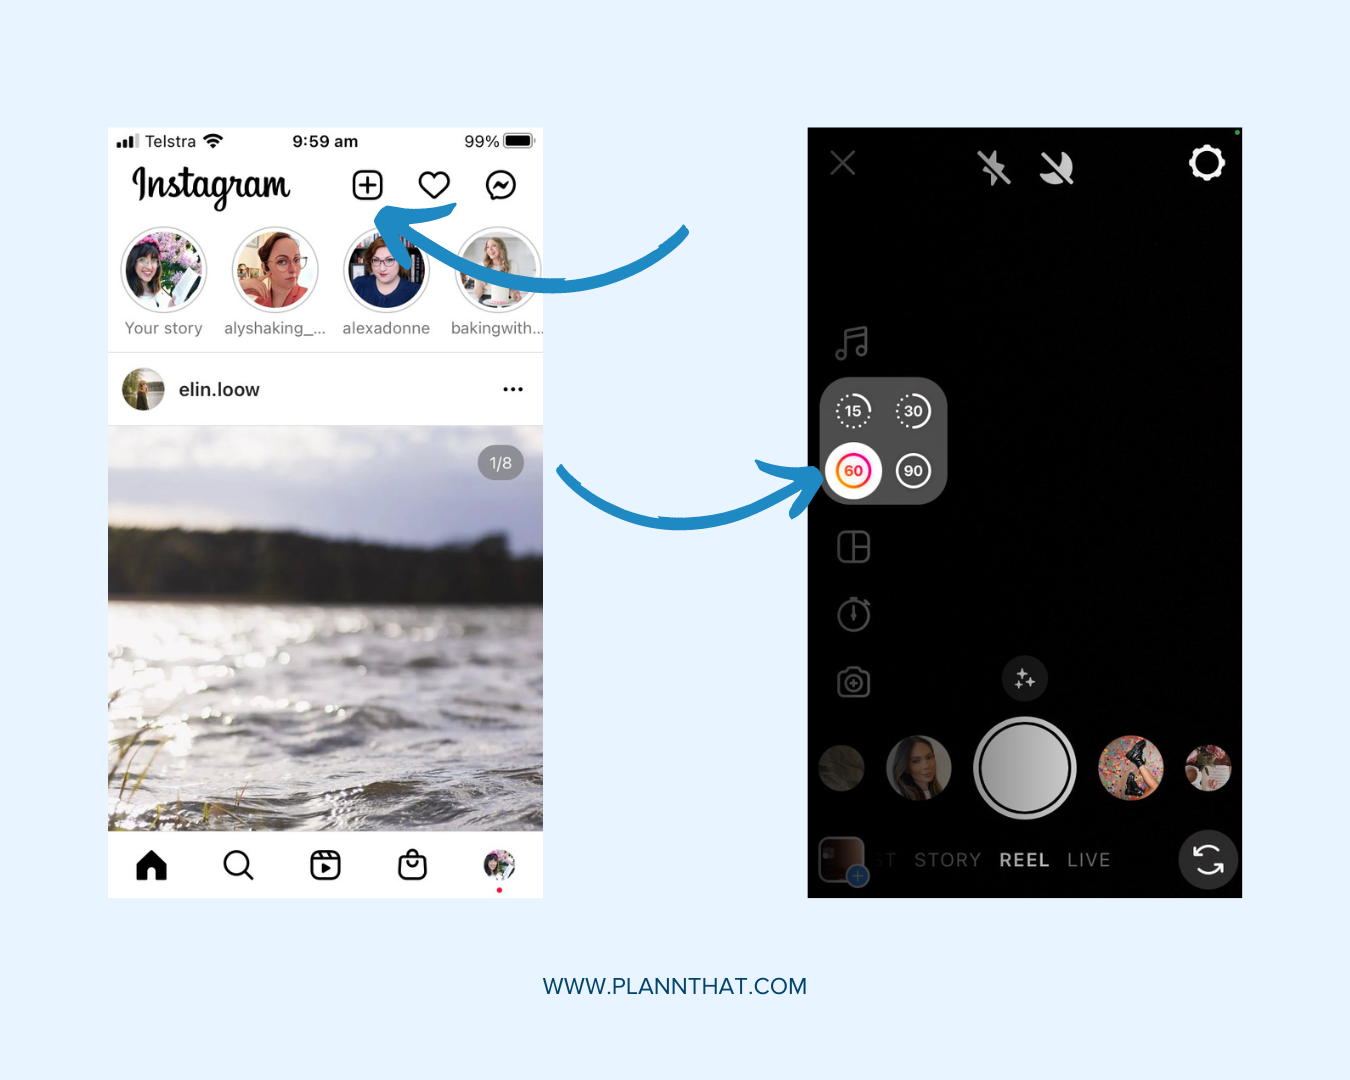
Step 1: Navigate to your Instagram home page, and tap the + icon at the top of your screen.
Step 2: At the bottom of the screen, select reel.
Step 3: On the left side of your screen, you’ll see an icon menu. To select your video’s length, choose the numbered circle icon, and select the number of seconds you want to apply.
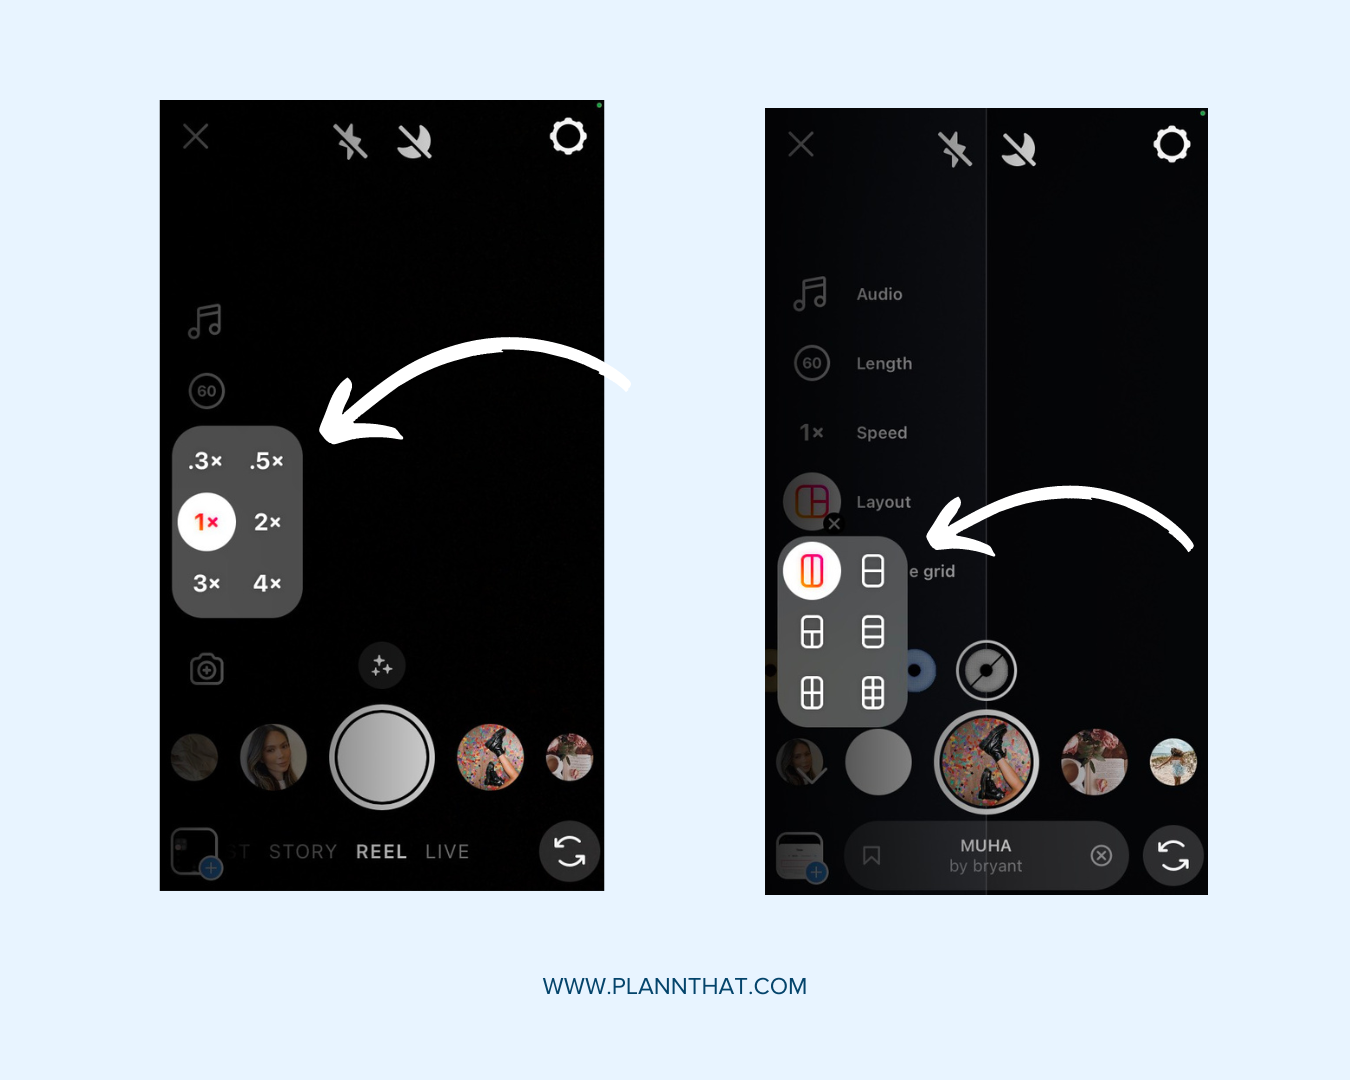
Step 4: To adjust your video’s speed, select the icon presented as 1x, and choose the speed you want to film at. This is also a great way to record a timelapse!
Step 5: To change the layout of your video, choose the layout icon, and select your desired grid pattern.
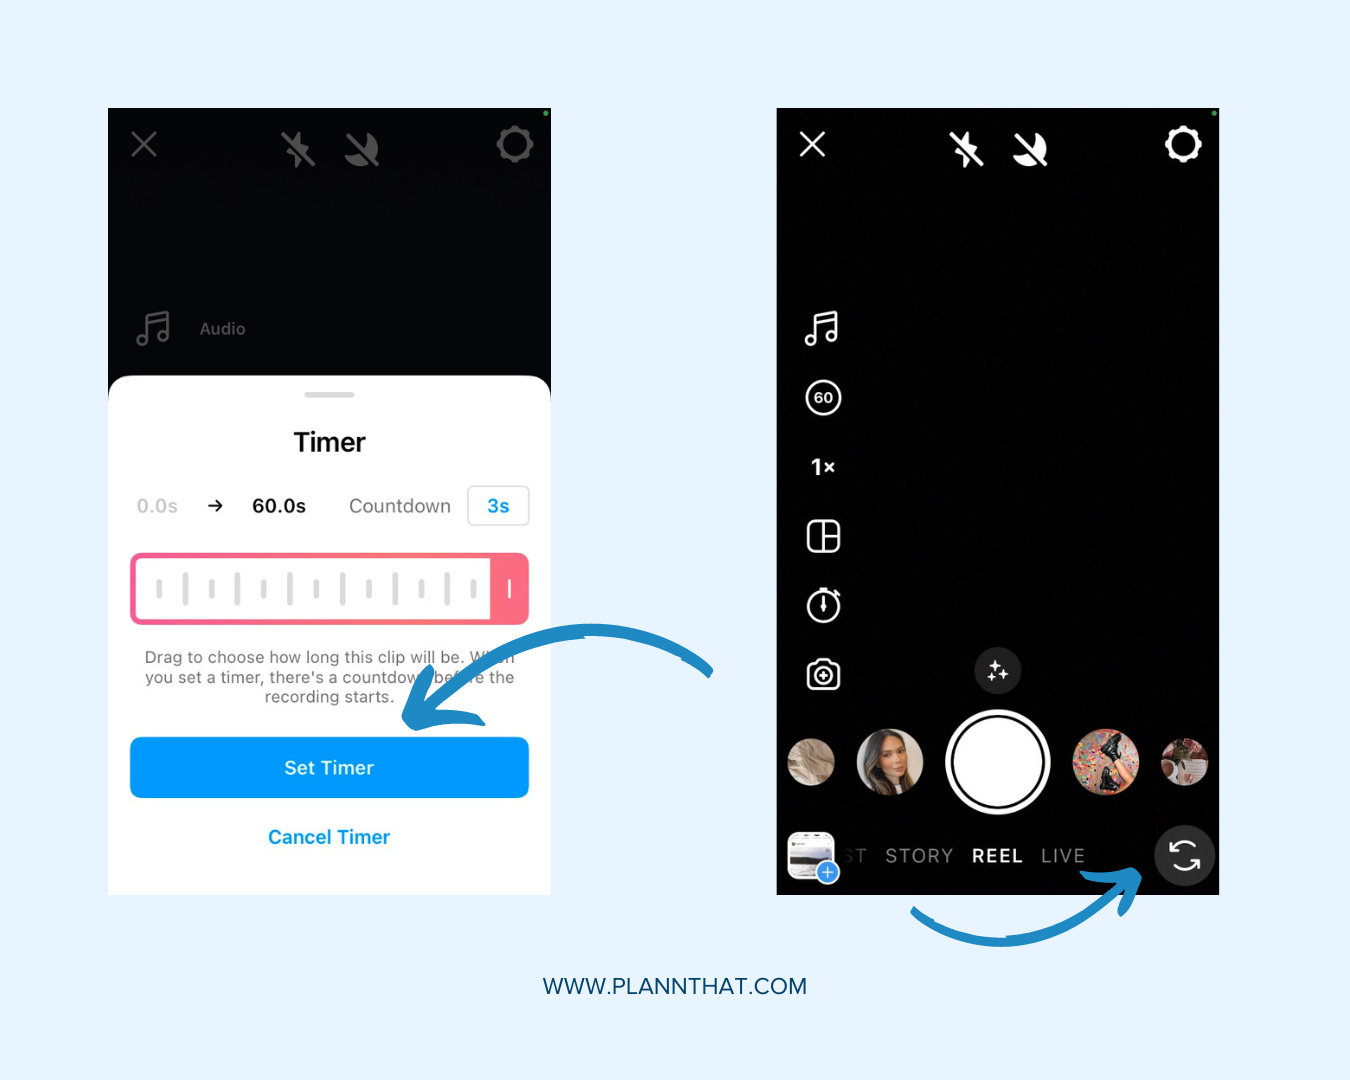
Step 6: To set a timer and film hands-free, choose the stopwatch icon. Here, you can drag to adjust the length of your clip and edit the countdown before selecting set timer.
Step 7: When you’re ready to start filming, use the reverse icon at the bottom right of your screen to choose your front or back phone camera. Then tap the grey record button at the bottom of the screen to start the countdown and record content.
Step 8: When your content is complete, hit the square pause button and tap next to progress to the edit screen.
Step 9: What if you want to use existing content instead of capturing new video? Choose the photo icon at the bottom left of your screen to upload from your camera roll.
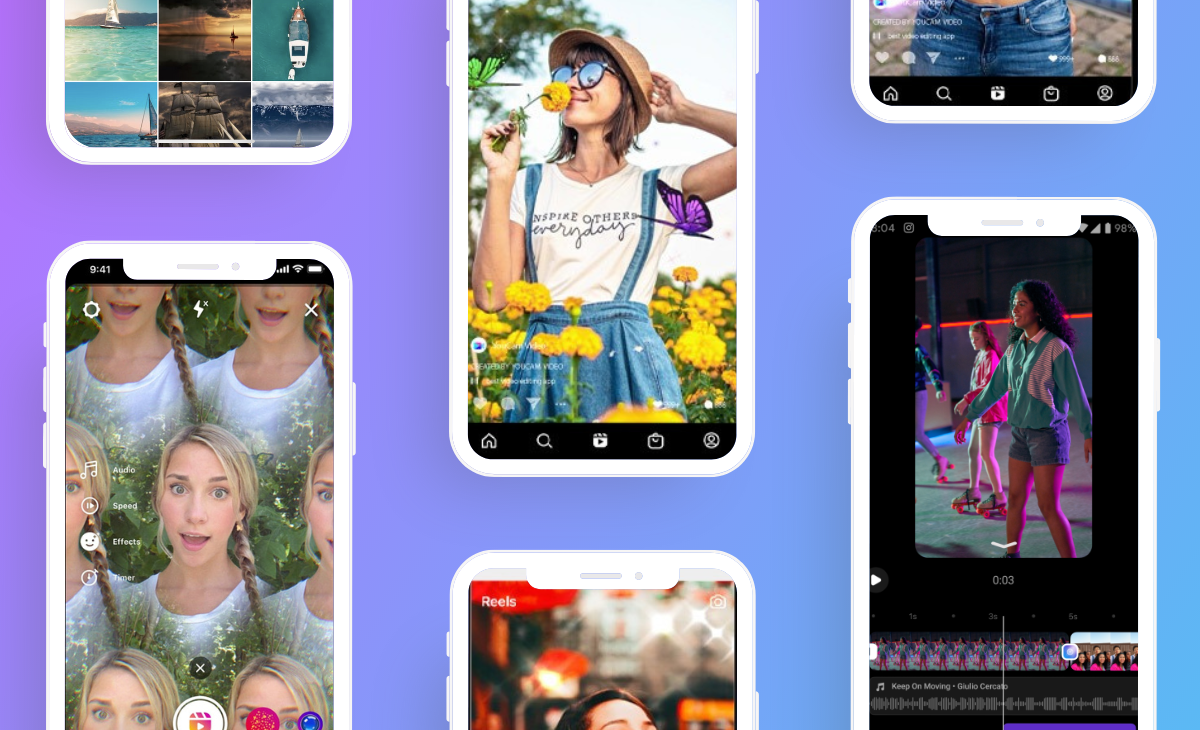
Using Effects
Effects are a great addition to your Instagram Reels! Here’s how to use them.
Step 1: To apply filters before filming, scroll through the filter menu at the bottom of your screen, and select your chosen filter before hitting record.
Step 2: To access extra filters, choose the stars icon, and browse additional options.
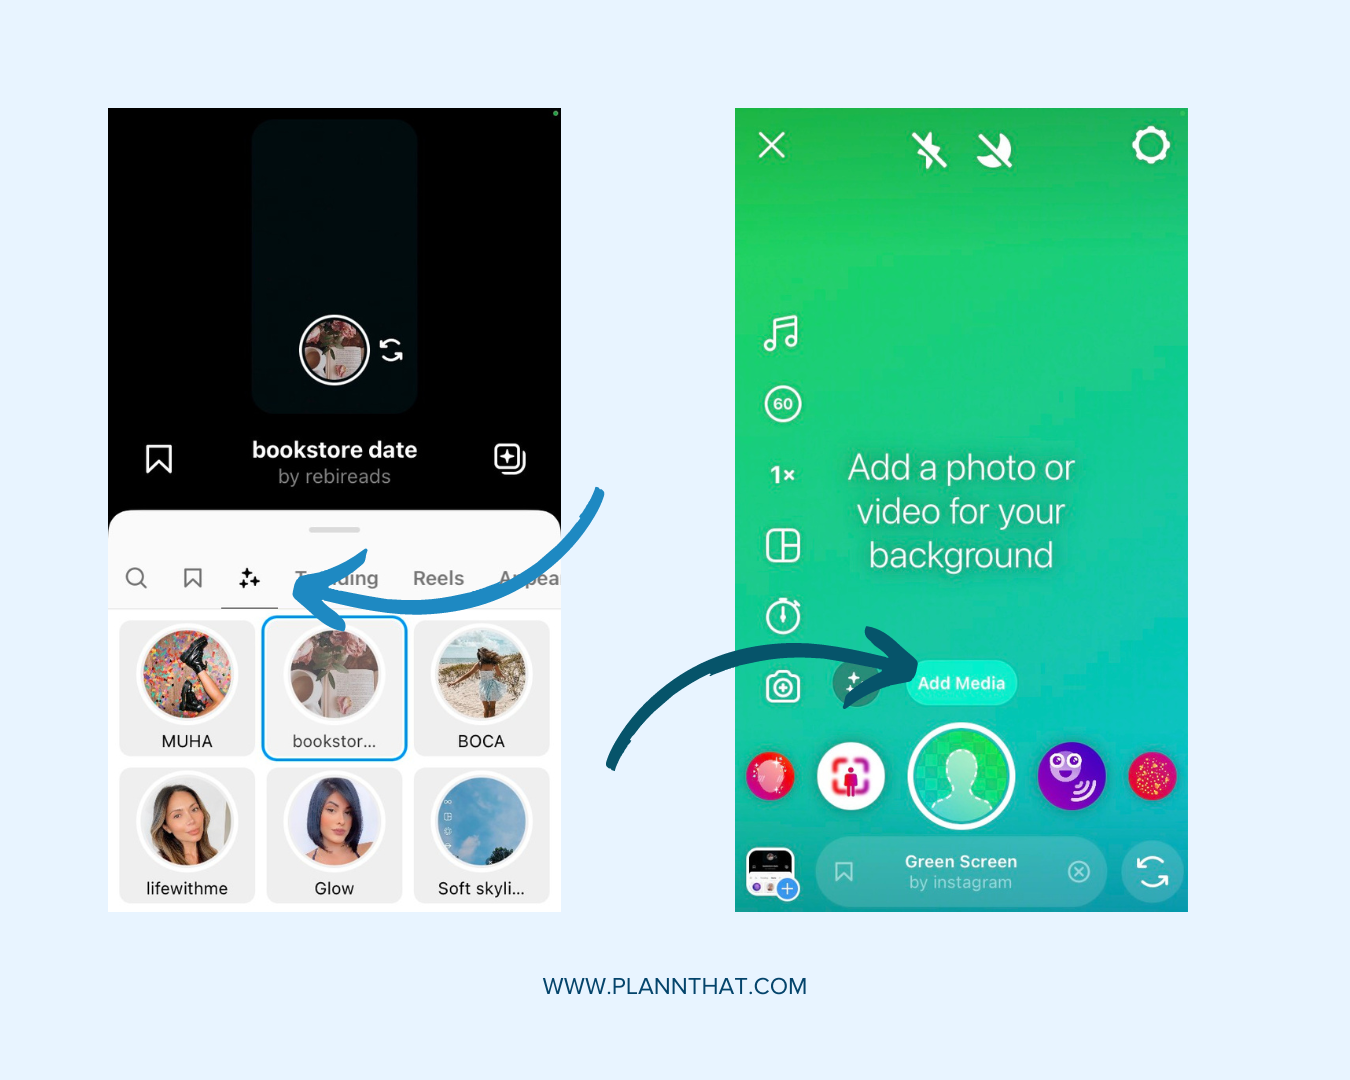
Step 3: To use a greenscreen, select the greenscreen filter, and choose add media to select a background.
Step 4: After filming, you’ll have fewer filter options, but you can still add them! Do this by tapping the stars icon at the top of the edit screen.
Step 5: To add stickers, tap the sticker icon at the top of the edit screen, and choose whether to add a poll, question, quiz, or something else.
Creating Transitions
If you’re filming multiple clips, Instagram Reels transitions can make a big difference to your video production quality.
Step 1: After filming your first clip, select the align icon from the left-side menu. This will show an opaque outline from your last clip so that you can match alignment.
Step 2: Once you’ve filmed multiple clips, go to the edit screen, and choose edit clips.
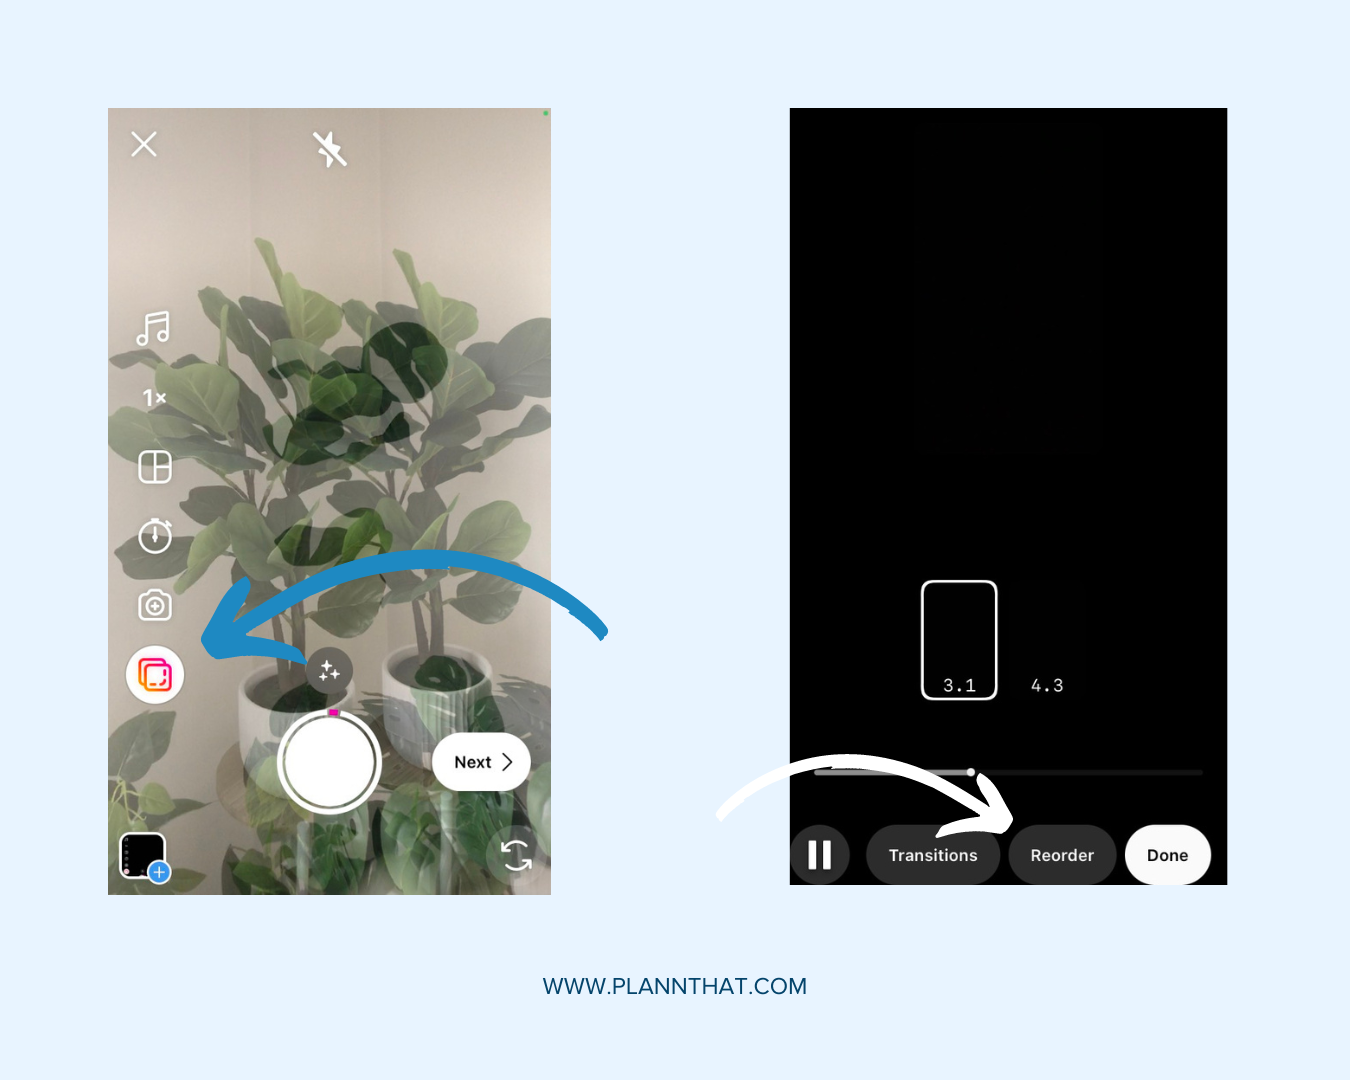
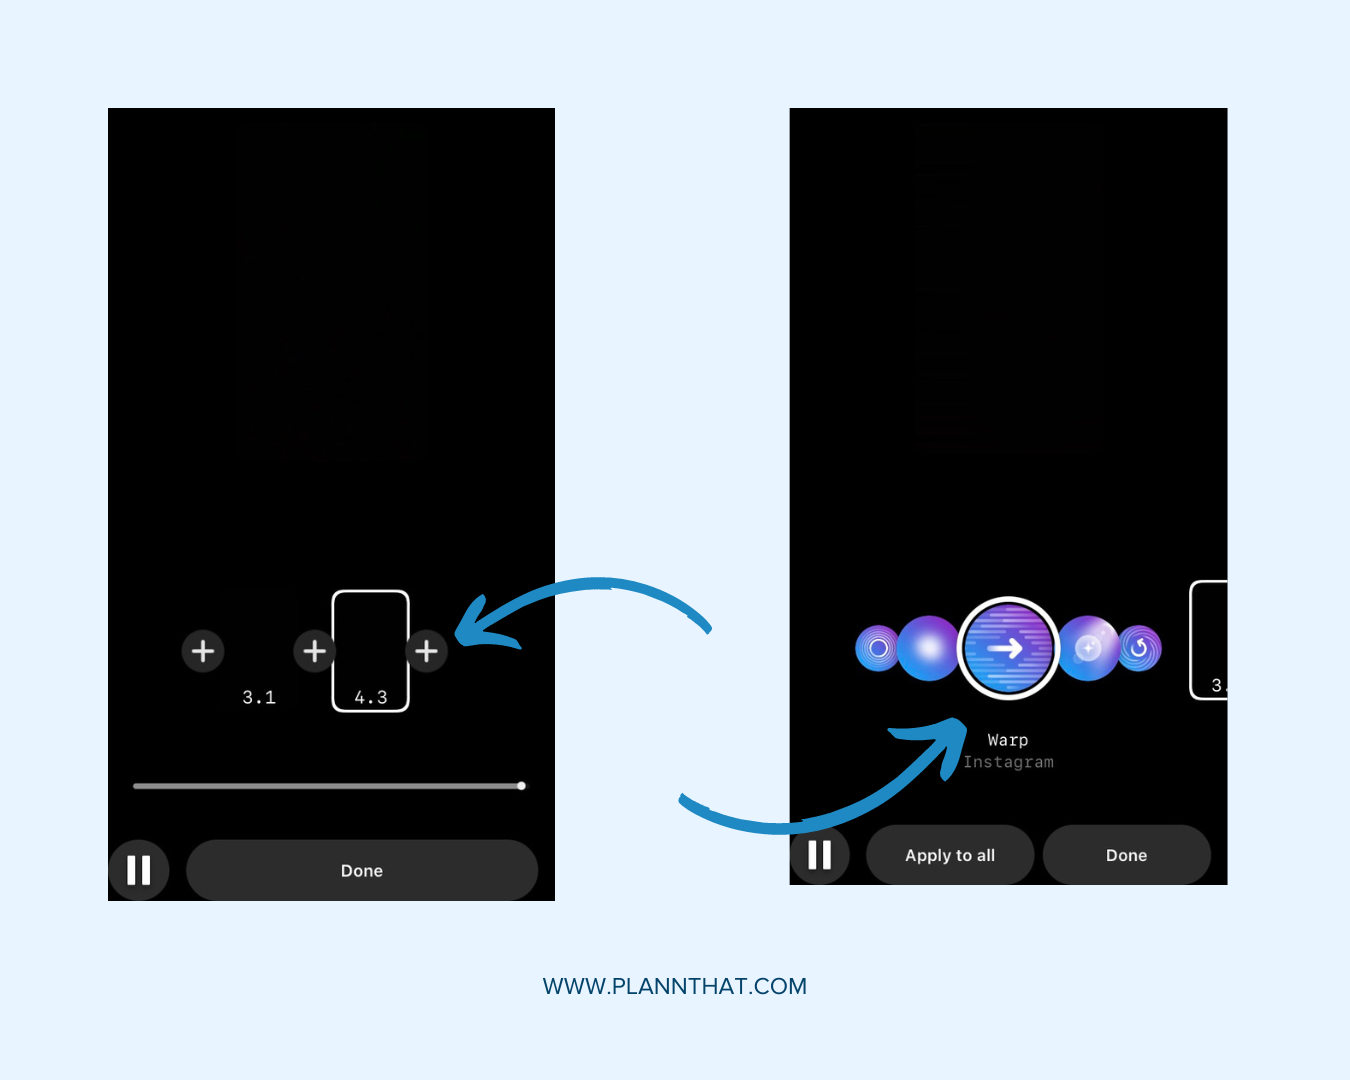
Step 3: Choose reorder to change the order in which clips appear.
Step 4: Choose transitions, then select the + icons between videos to browse and select transition effects.
Including Audio
Sound is an important part of any video! Here’s how to add it to your Reels.
Step 1: Before filming a new video, tap the music icon on the left side of the screen.
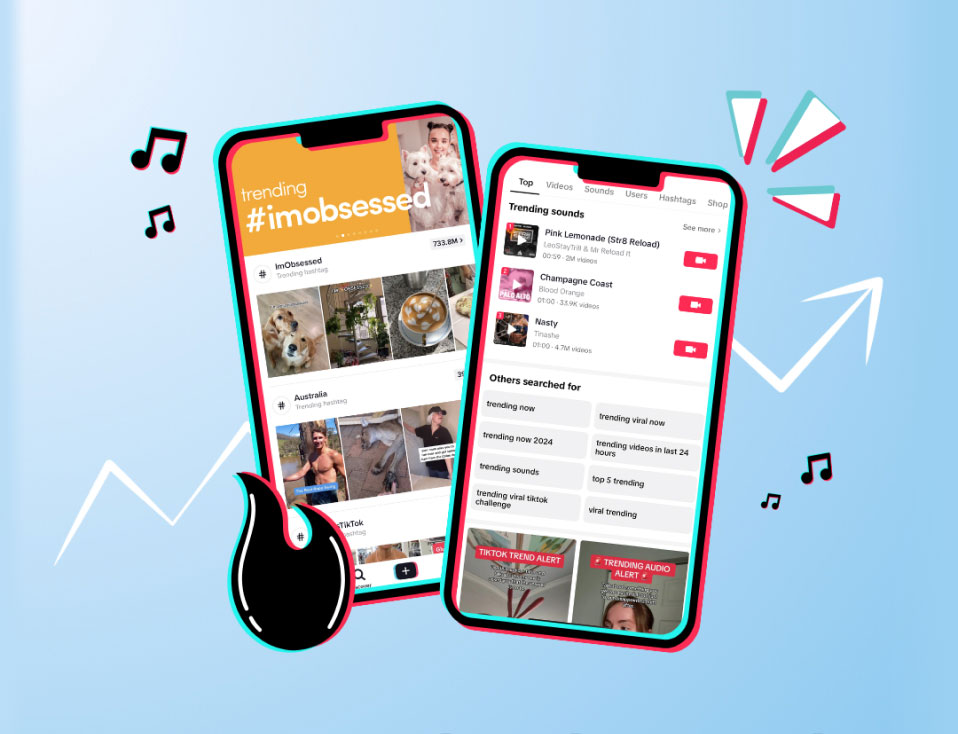
Step 2: This will open up the audio library. Use the search bar to find songs, or browse featured and recommended sounds.
Step 3: To access saved audio tracks, choose saved at the top of your screen, and click on the sound you want to use.
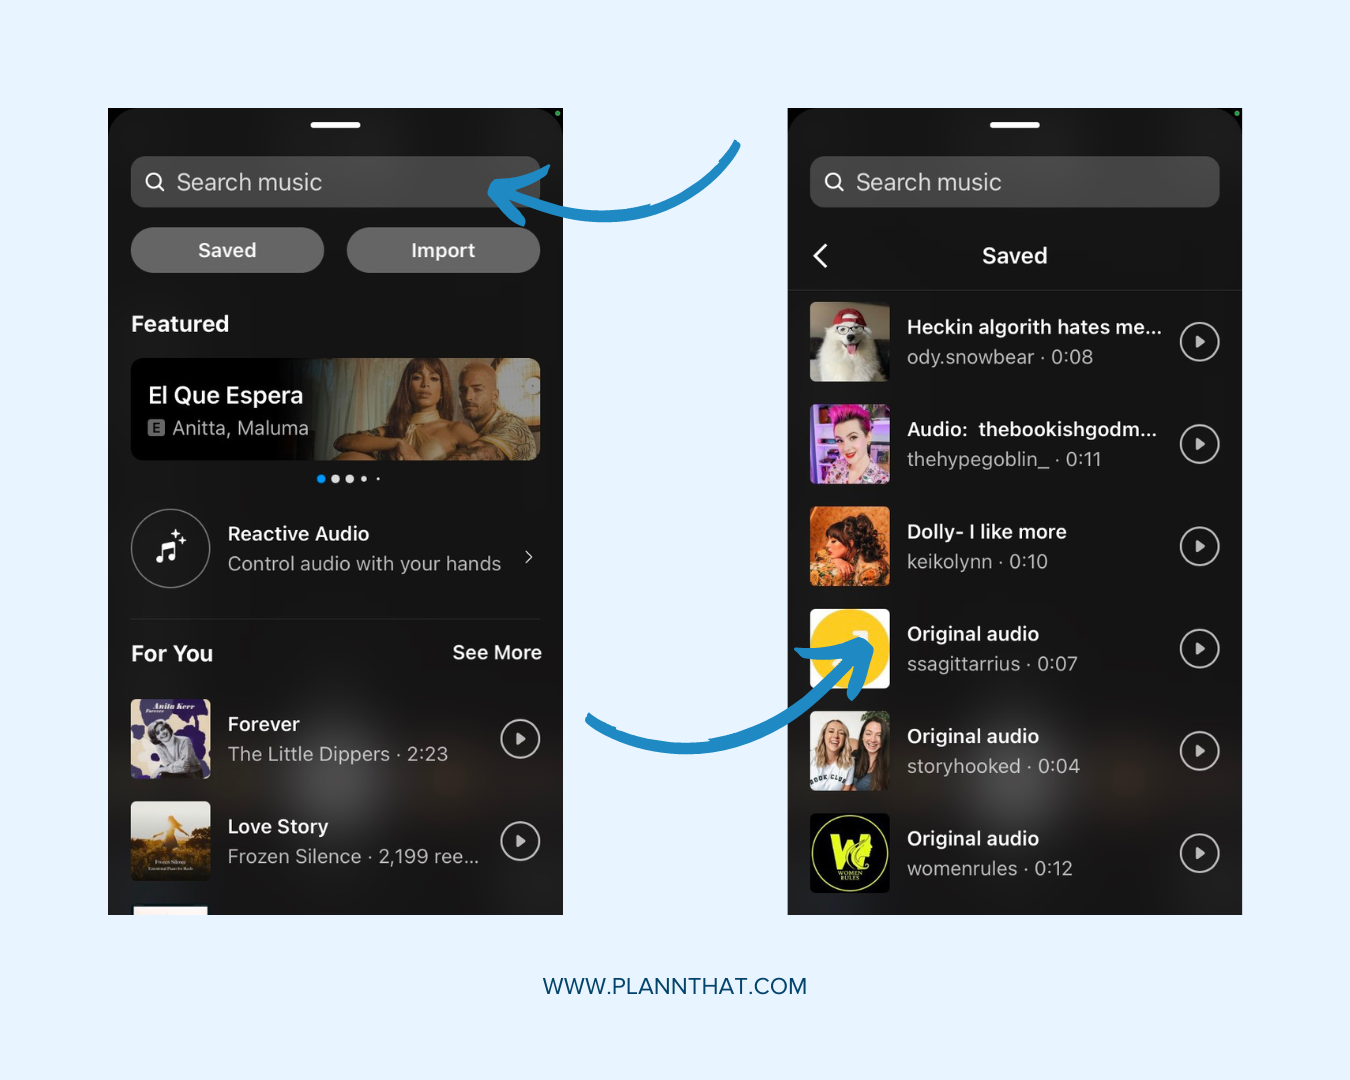
Step 4: Alternatively, choose import to upload audio from a video in your device camera roll.
Step 5: Select reactive audio to access tracks that respond to your filmed actions, and choose the category that suits your requirements.
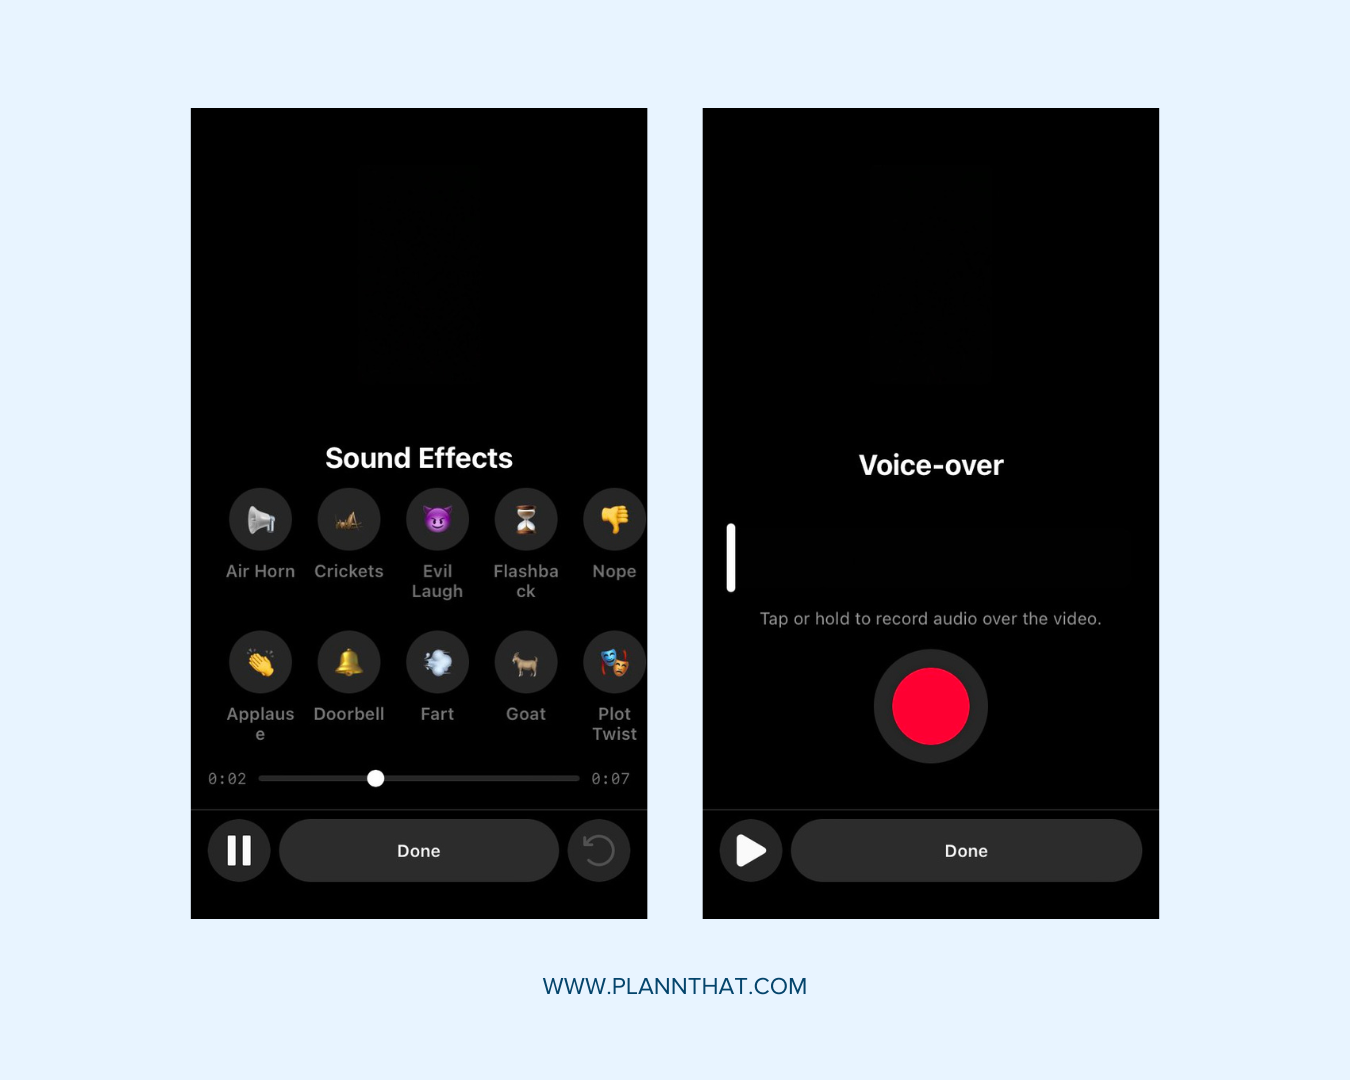
Step 6: What if you’ve already recorded a video without sound? In this case, progress to the edit screen and select the music icon from the top of the screen.
Step 7: Here, choose whether to add music from the audio library or Instagram sound effects. You can even choose voiceover to record your own audio track.
Adding Text
Next up is text! Here’s how to add it in.
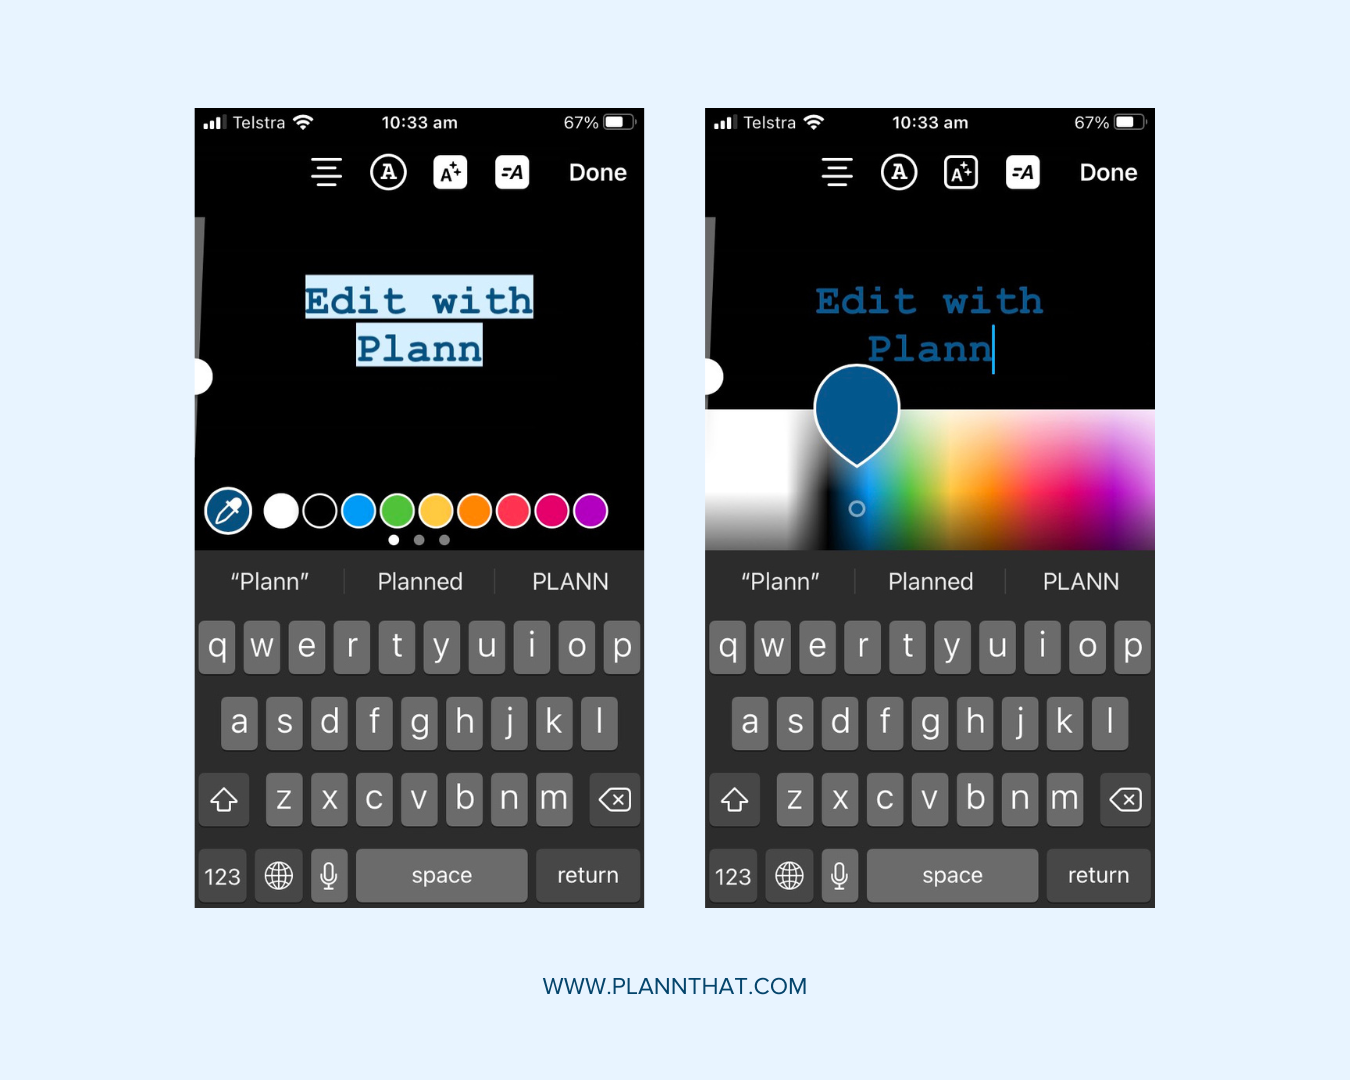
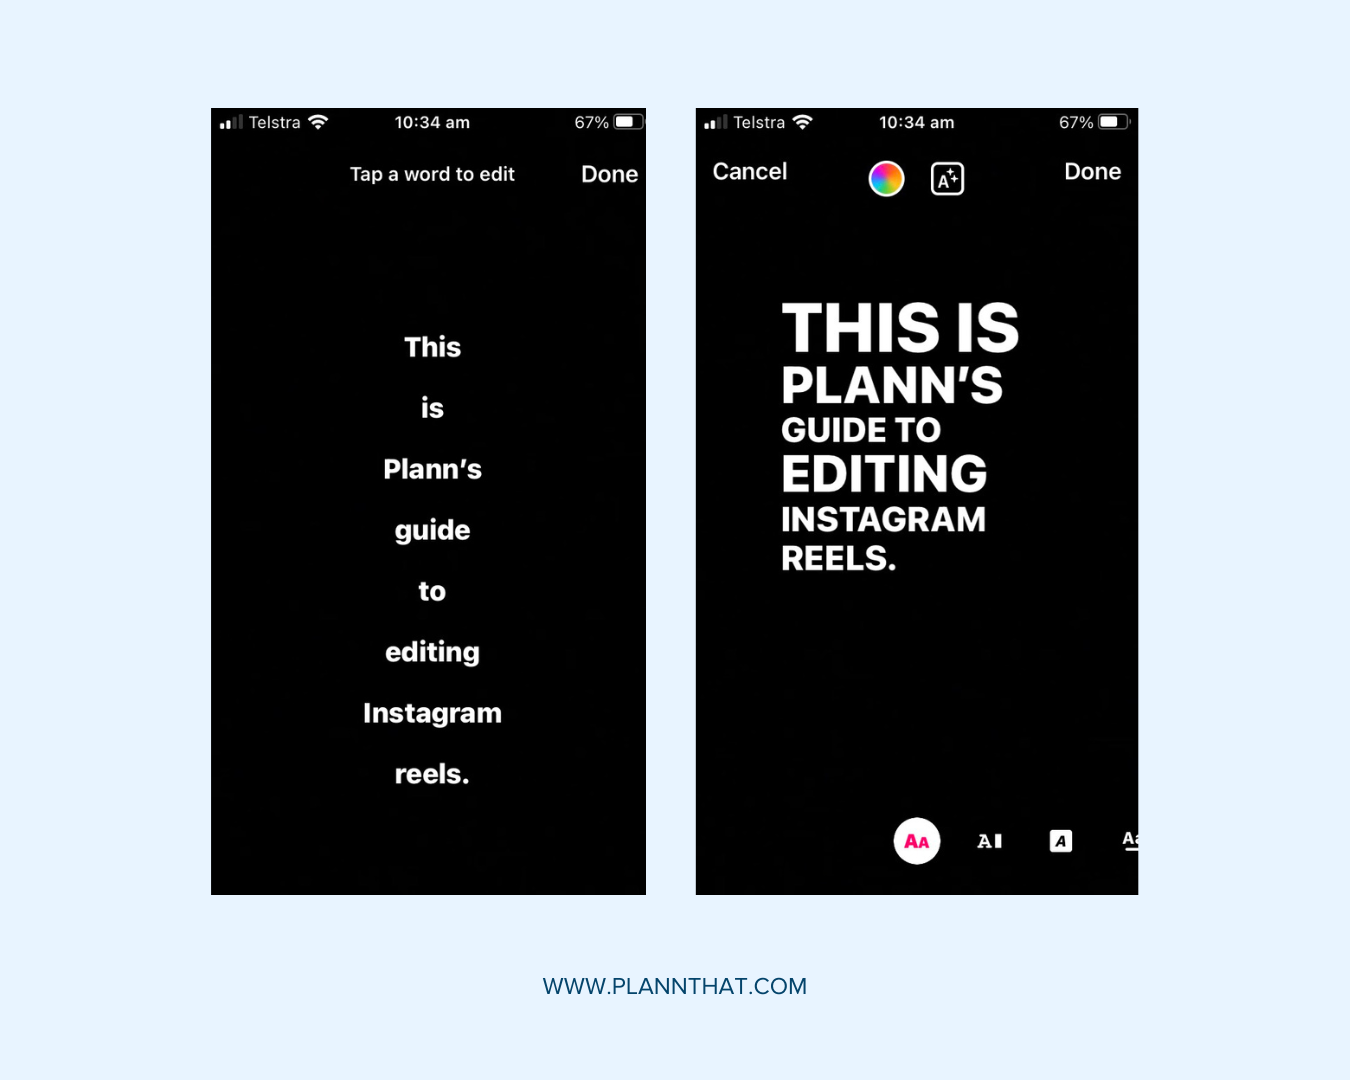
Step 1: Once your video is complete, navigate to the edit screen, and select the text icon from the top-bar menu.
Step 2: Use the keyboard to type, and scroll through fonts to select your desired look.
Step 3: To change text color, select the color icon at the top of the screen, and choose from the provided list or tap and hold a color to access the slider.
Step 4: To add a background for text, tap the text with stars icon at the top of the screen.
Step 5: To add captions to your video, select the sticker icon, and choose the captions sticker.
Step 6: Tap on text to edit any errors. Then drag captions to position them on the screen.
Remixing Content
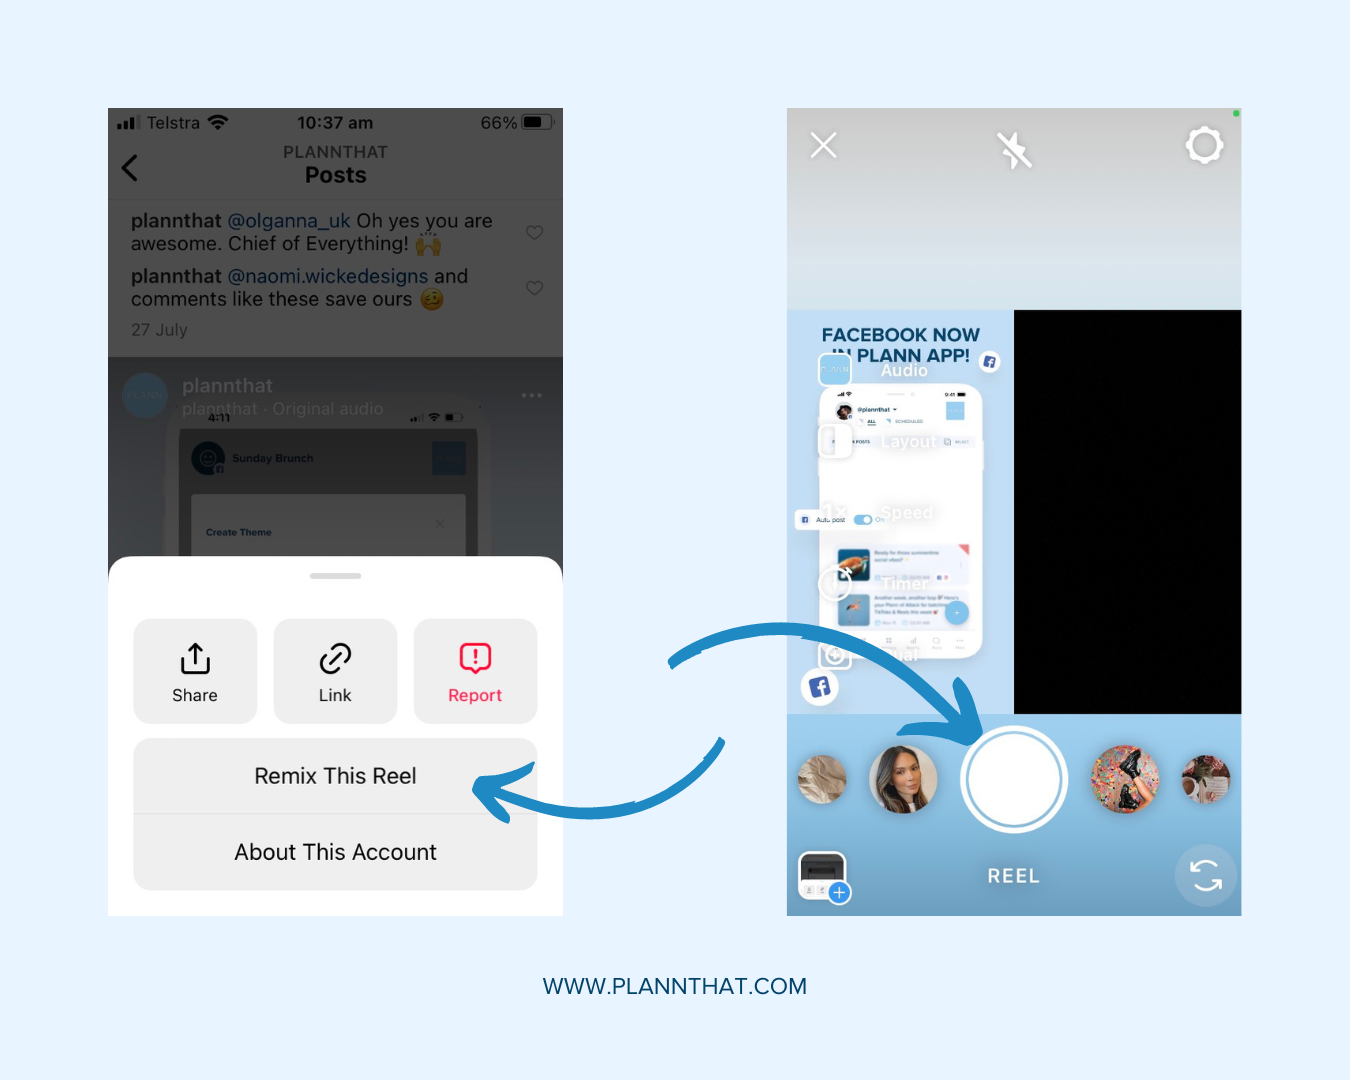
Want to remix someone else’s Reel? Here’s how you can!
Step 1: Find the Reel you want to remix, and tap the ellipsis icon at the top right of the video.
Step 2: Select remix this reel, and choose whether to remix with or after the original video.
Step 3: Use your Reels recording skills to capture content to accompany the original clip.
Step 4: Edit and publish as normal!
Uploading a Cover & Caption
Once you’ve finished editing your Reel, you’re almost ready to share it with the world! Here’s what you should do next.
Step 1: Click next to go to the publish screen.
Step 2: Use the description space to write an engaging caption.
Step 3: Scroll down to choose whether to share your Reel to your feed. Here, you can also add a location, rename audio, or tag other Instagram users.
Step 4: Tap advanced settings to make decisions about captions, Facebook recommendations, and more.
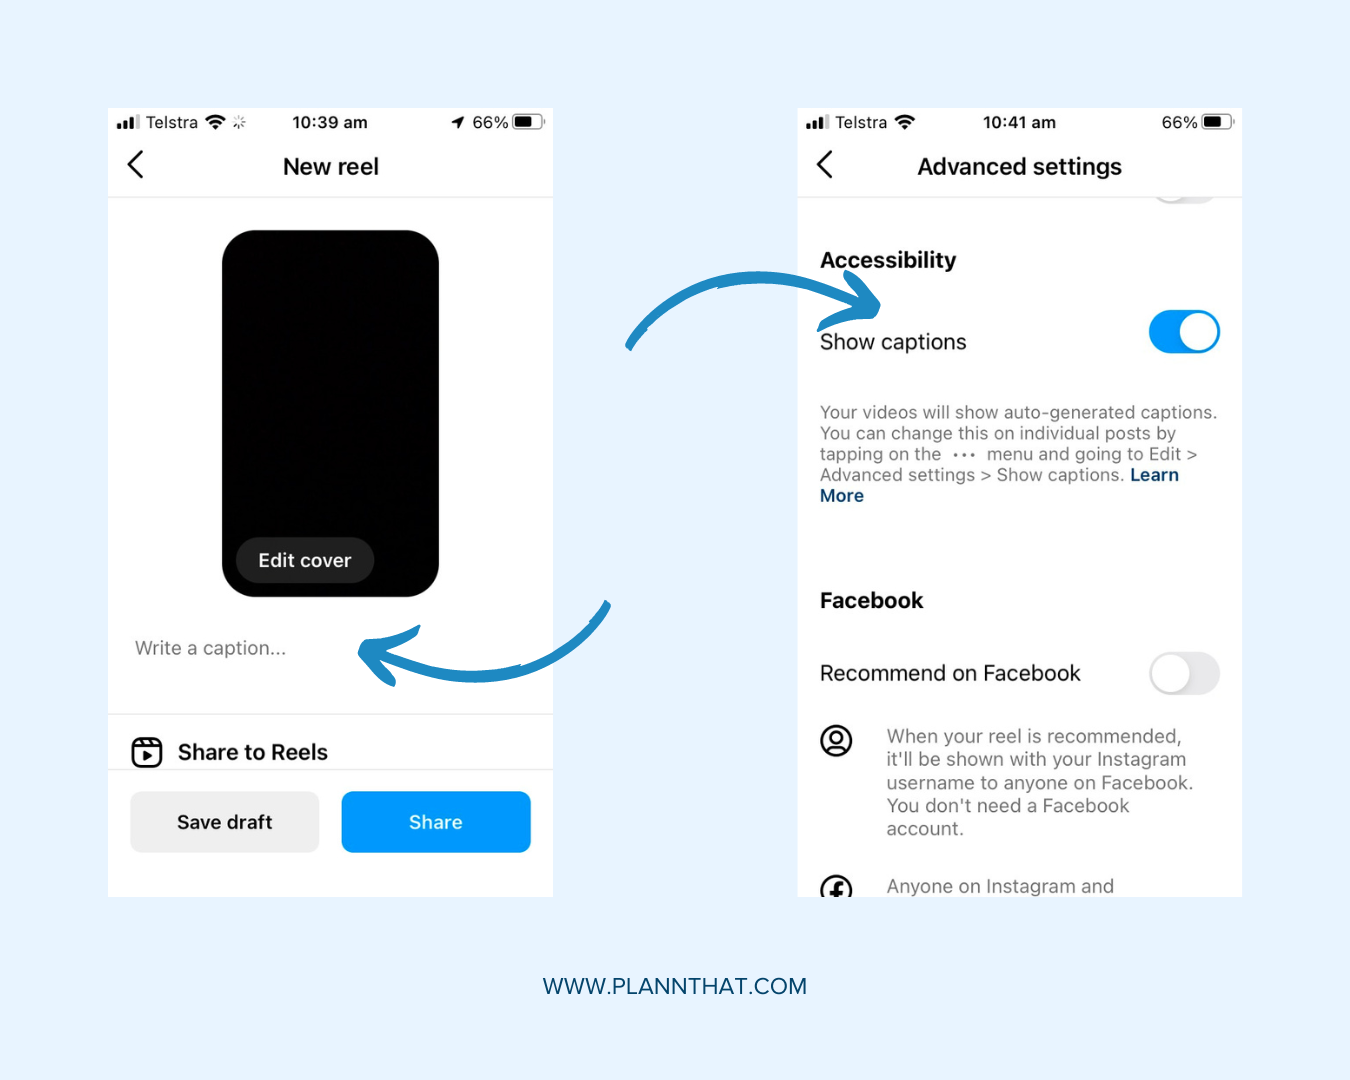
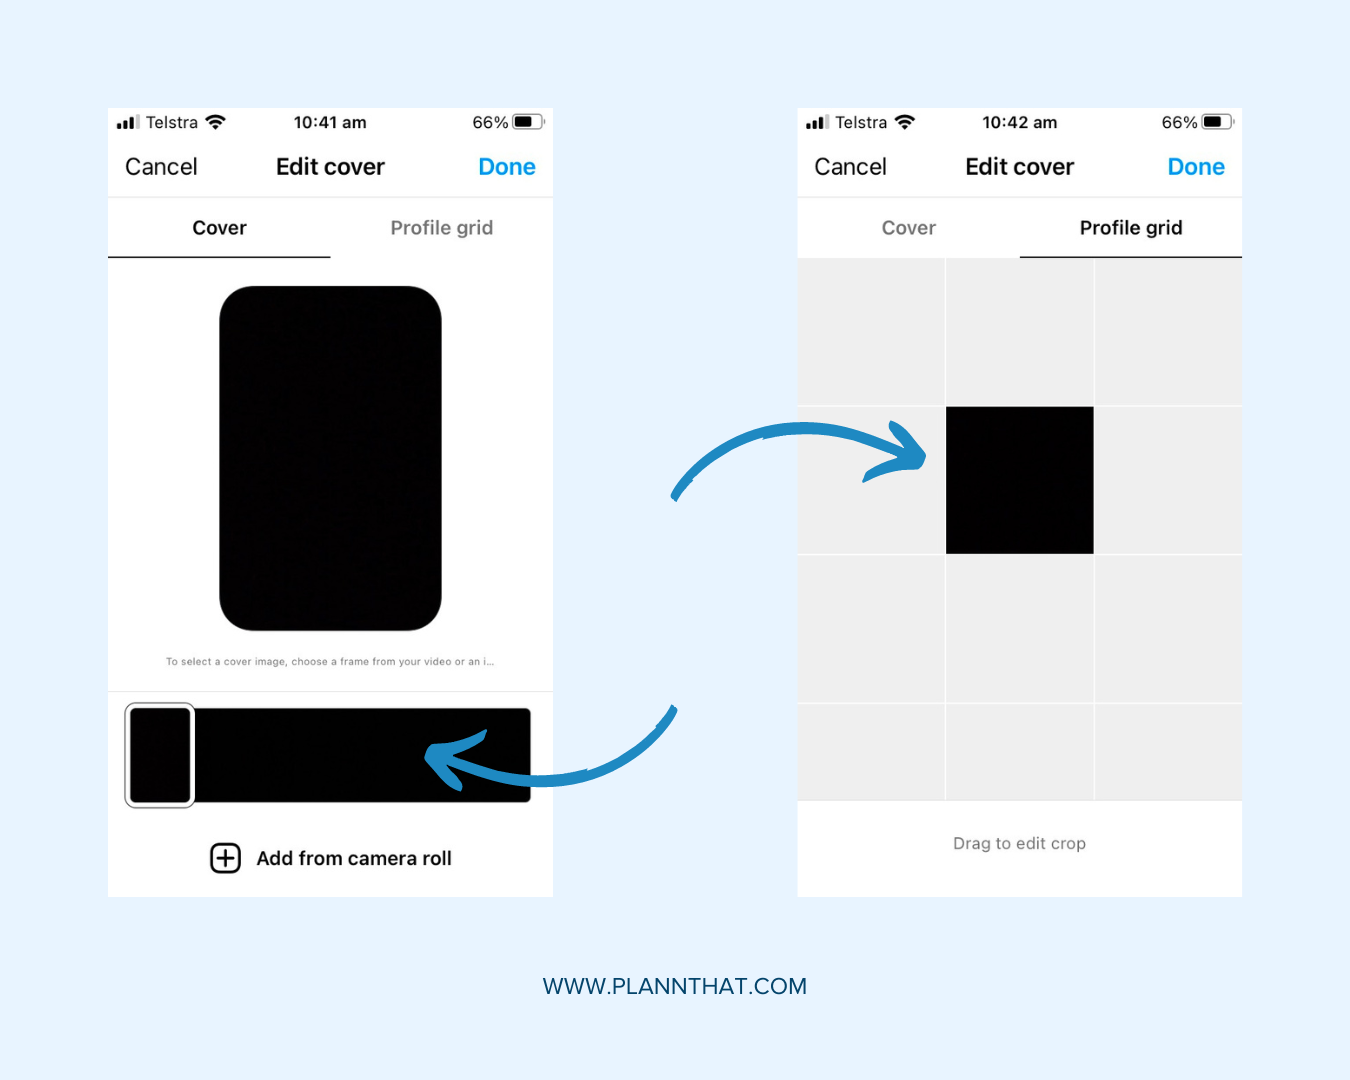
Step 5: Tap edit cover on your Reel’s thumbnail, and drag slider to select a cover image.
Step 6: Alternatively, upload from camera roll to select an existing cover image.
Step 7: Select profile grid to choose how your cover image displays on your account.
Step 8: Finally, share your Reel.
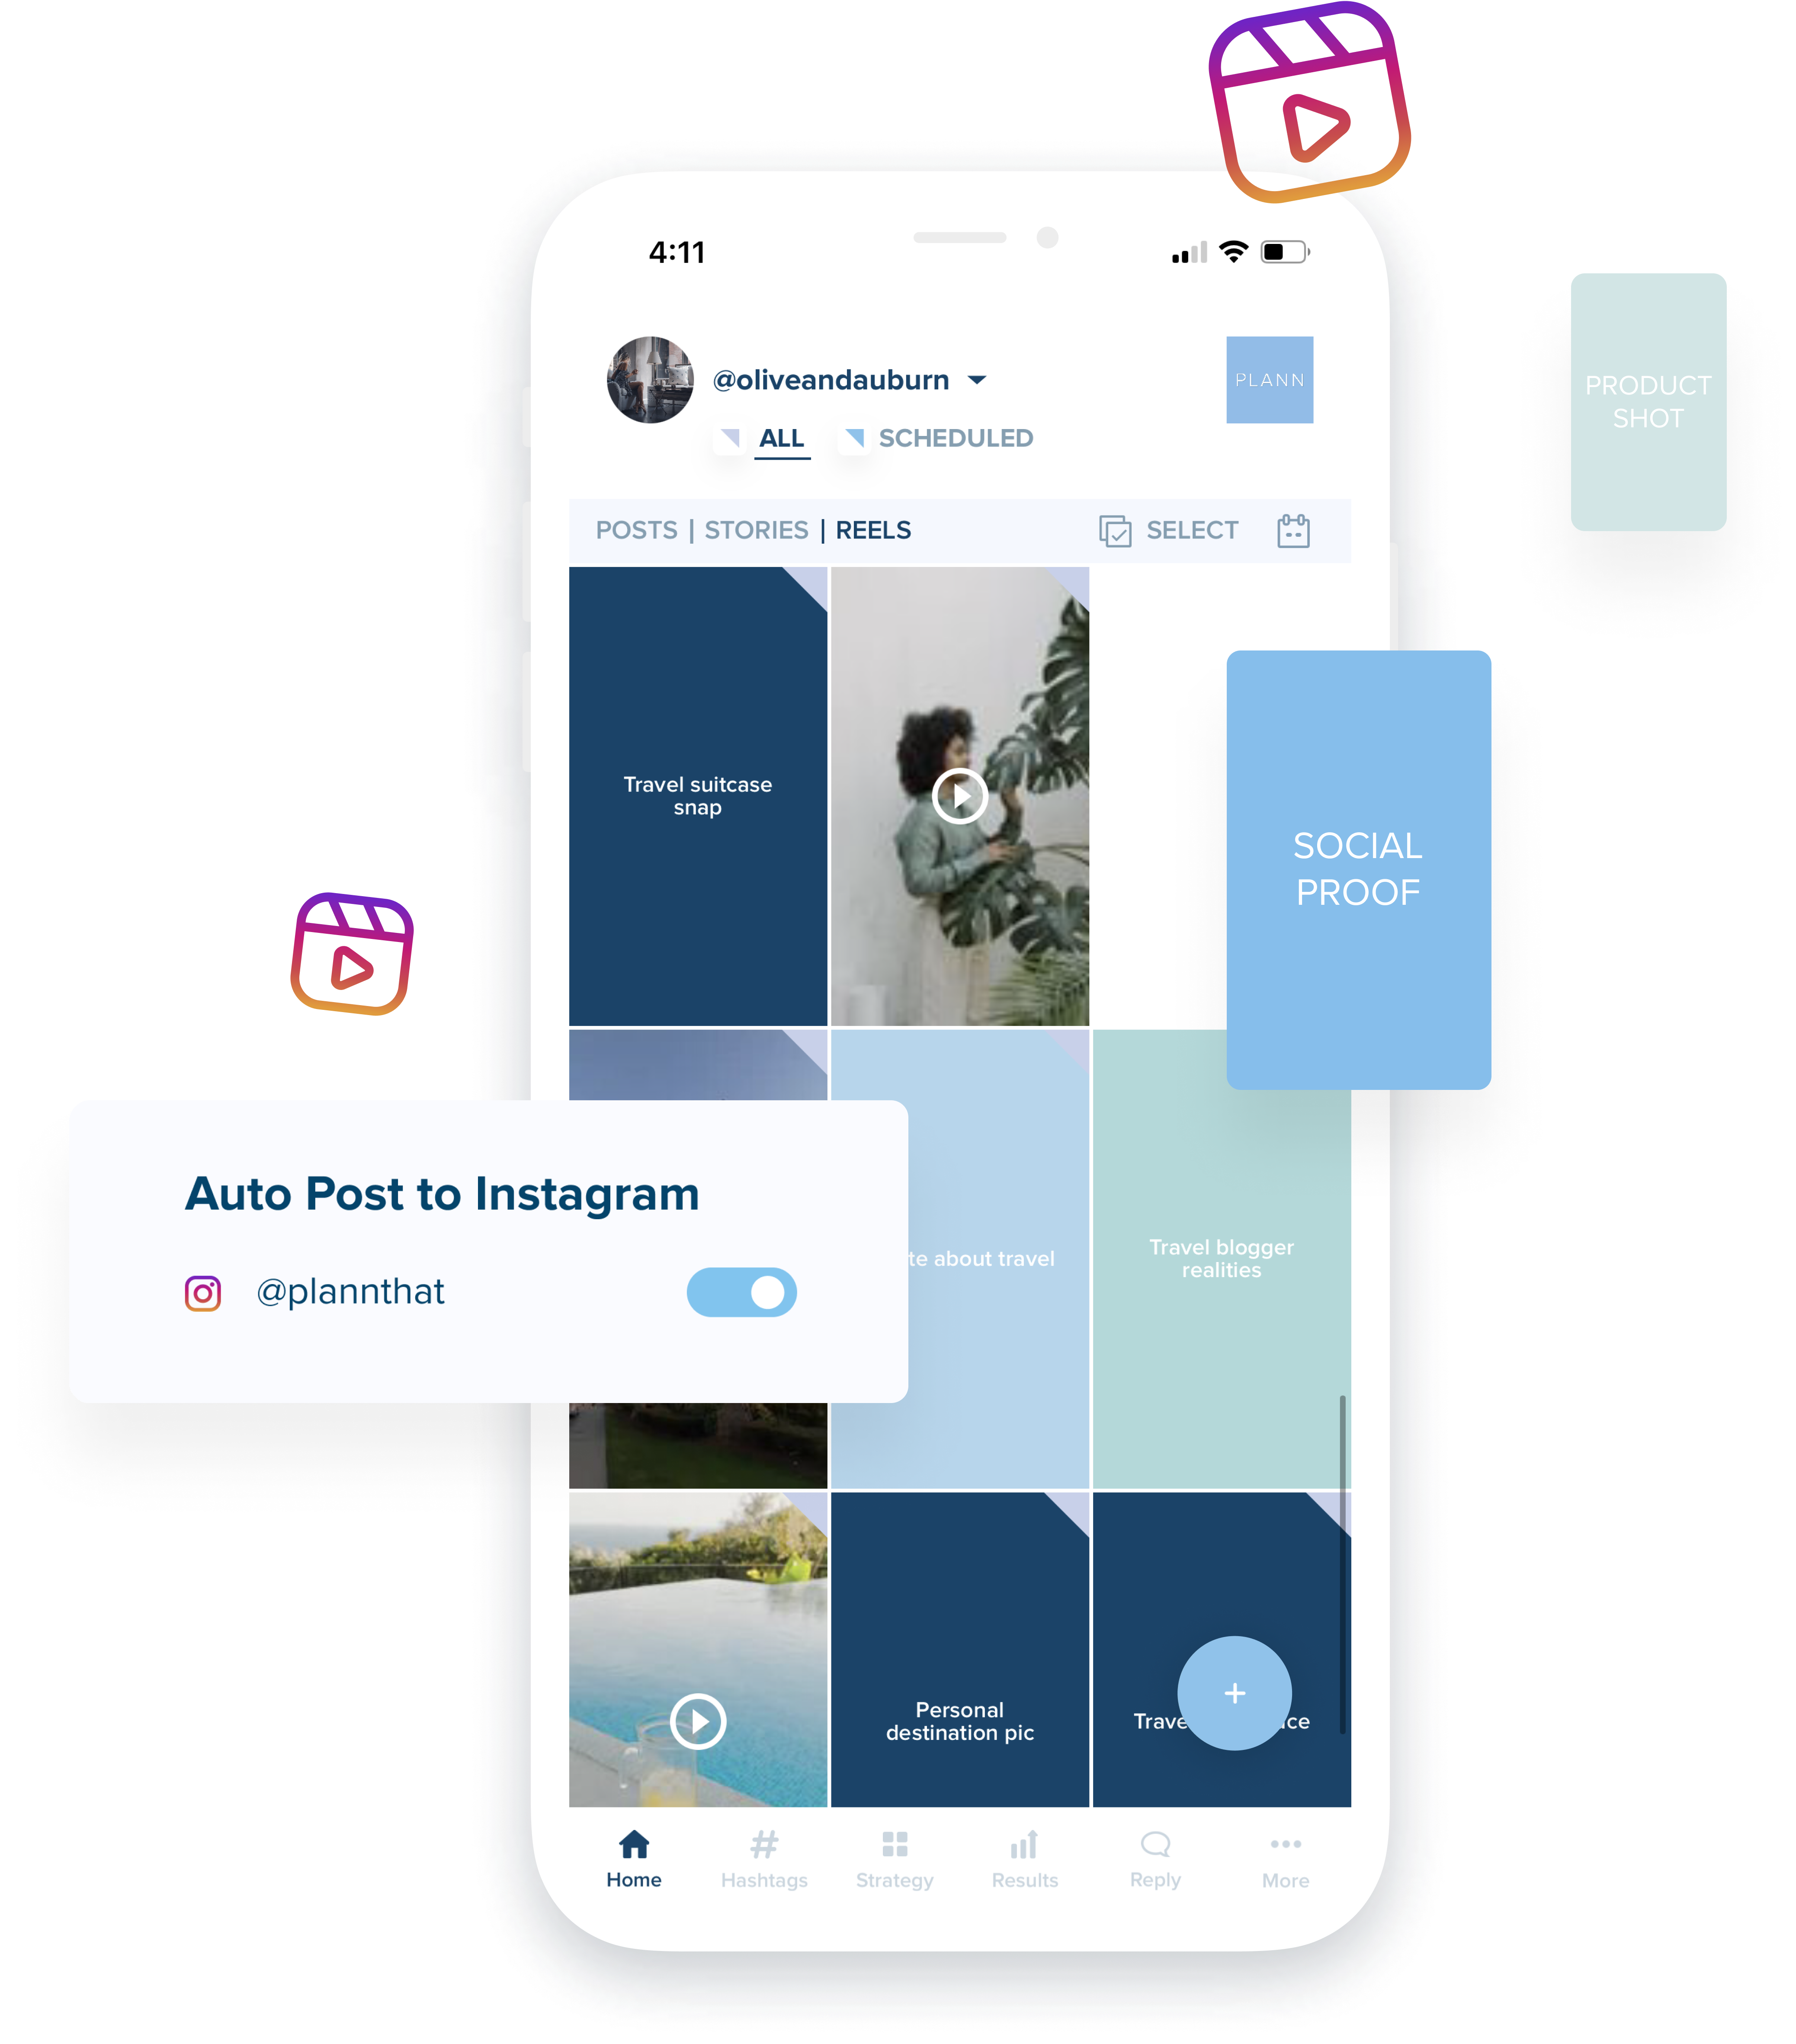
Plann for success with Instagram Reels
As always, the best way to set yourself up for social media success is by learning to Plann your content! Sign up for a free 7-day trial of Plann, and start creating amazing Reels right now.